 |
| Not a bison heart. This is Whitaker. He lives with my friend who provided the heart. I didn't want to gross you all out at the outset. |
Friday, December 6, 2013
More Offal Adventures: Bison Heart
Friday, November 15, 2013
Chickpea Pancake

I made this for a neighbor's home-brew party. It seemed like an excellent beer food. And it was, based on how quickly it disappeared! The recipe is from Mark Bittman's How to Cook Everything Vegetarian, though I tweaked it a little. Garbanzo bean (or chickpea) flour is easier to find in these gluten-free times. I found it in the natural food aisle of my local King Soopers among all the other more esoteric flours brought to you by Bob's Red Mill. It's a brand I love not for the gluten-free stuff, since I eat gluten with great relish, but because they carry lots of interesting things, like buckwheat flour, multigrain cereals, and polenta.
I used a 12" cast-iron griddle - the one in the photo - but Bittman says you can use a 12" skillet or pizza pan with a raised edge because the batter is quite thin. Make sure it's well-seasoned or non-stick to avoid sticking.
Chickpea Pancake
(serves 4-6 as a side dish, 12 as an nibble with beer)
1 cup chickpea flour
1 ½ cups warm water
1 teaspoon salt
1 teaspoon black pepper
4 Tablespoons tasty olive oil
½ a small onion, thinly sliced
½ to 1 Tablespoons chopped fresh rosemary
Place water in a medium bowl. Sift in chickpea flour (it tends to be lumpy) and whisk. Add salt, black pepper, and 2 Tablespoons olive oil. Cover with a towel and let sit for 30 minutes or up to 12 hours.
Preheat oven to 450°F. Put 2 Tablespoons olive oil in the skillet and brush or swirl it around to cover entire bottom. Add onions and rosemary to batter and mix. Pour into the skillet. Bake for 20 minutes until set. You can bake it another 5-10 minutes to brown it or you can stick it under the broiler to brown, if you skillet can take broiler temps.
Friday, November 8, 2013
Chard Stem Gratin
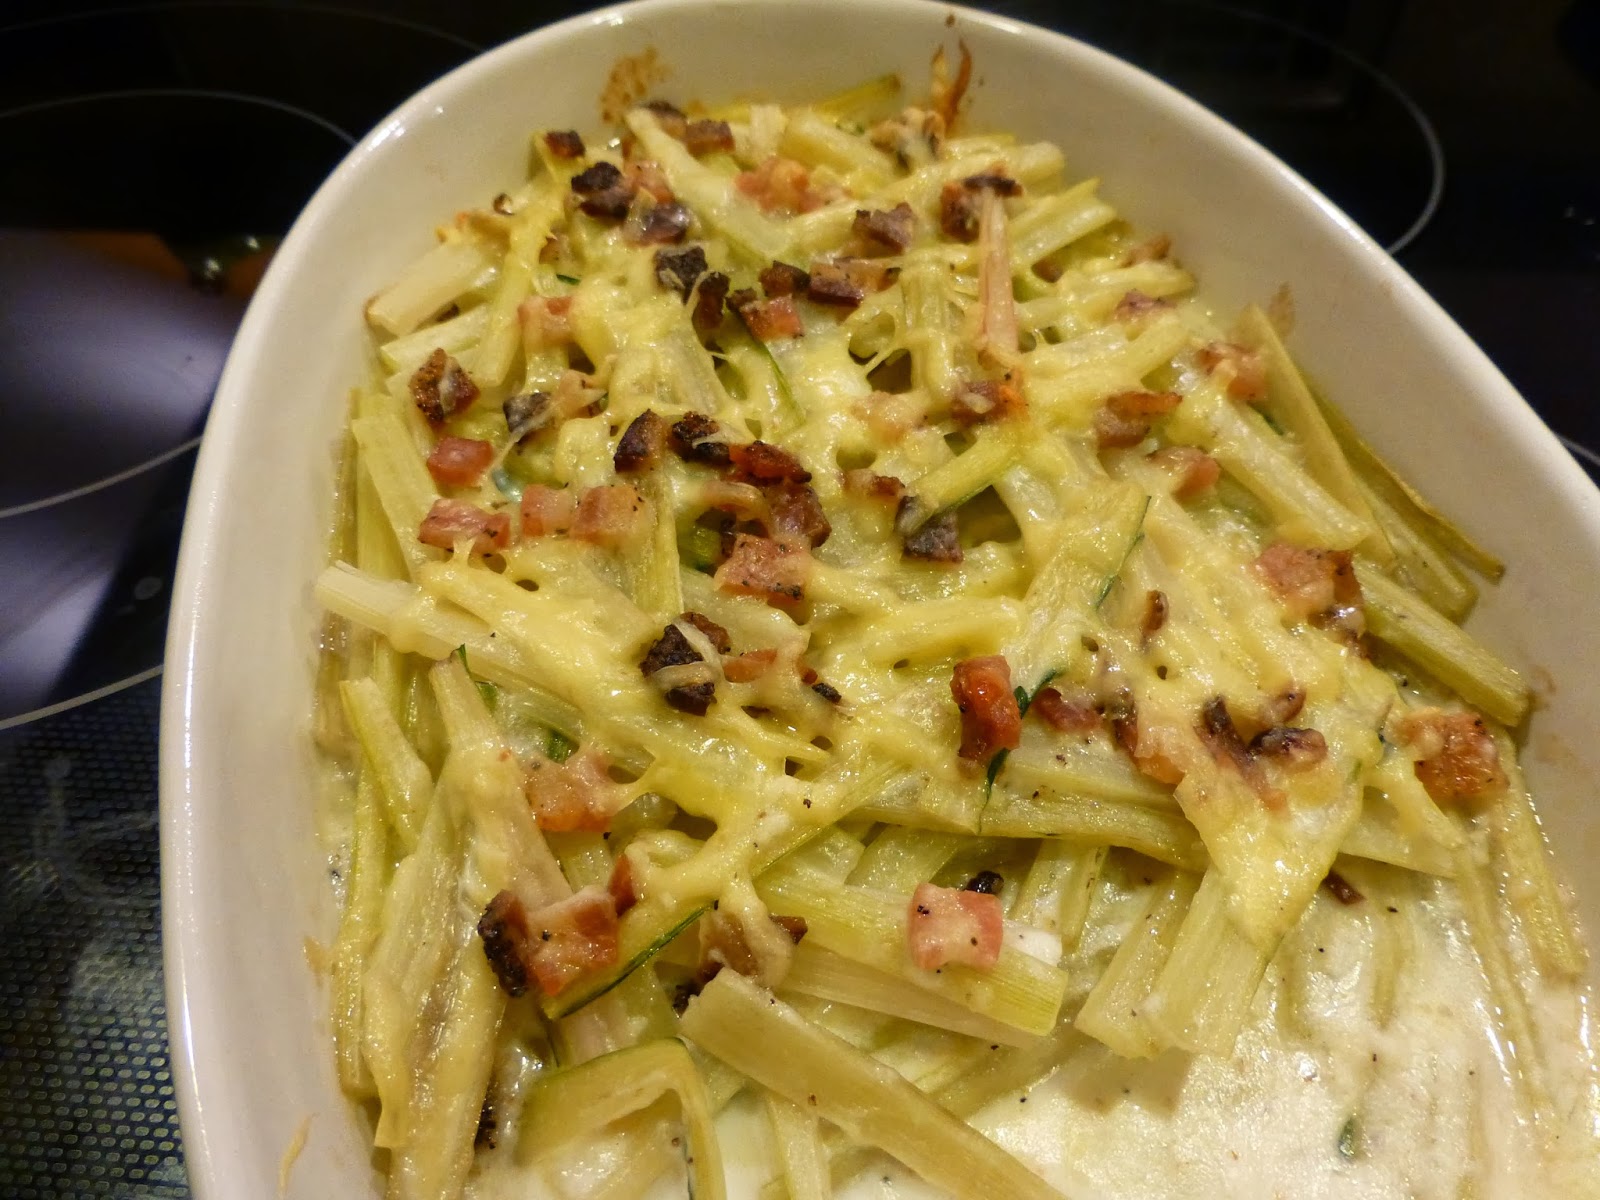
We're coming up on the end of chard season here in Colorado, at least in my sun-deprived garden. I picked it all this week because a) it's not going to grow anymore (that lack of direct sun thing), and b) it's getting below 20°F at night, which is cold enough to damage the leaves.
What does one do with all that chard? I picked about 1 pound of leaves and 2 pounds of stems. I usually separate the leaves from the big stems because the stems take much longer to cook. I will blanch and freeze a bunch (my husband and I can only eat so much chard). The rest went into this gratin.
A gratin is a baked dish, usually enriched with milk or cream, though you don't have to make them creamy and cheesy. I posted a non-milk based potato gratin; it contained only a small amount of cheese. The cooking liquid was broth. It was still quite tasty. This gratin is richer - but chard is not filling at all, so you want a richer sauce.
When shopping for chard, assuming you don't have a garden to provide you with a big bunch, buy about 2 ½ pounds. Chard yields 50% stem, and 50% leaves, approximately. Look for bunches with bigger stems. My garden chard (variety Burpee's Fordhook Giant) grows particularly large fleshly stems.
You can use bacon fat or butter for the sauce. If you use the bacon for garnish, dice it raw and cook it in a saucepan. Remove the bacon bits and add more bacon fat or butter to measure about 2 Tablespoons to make the sauce.
Swiss Chard Stem Gratin
(serves 6-8)
1 ¼ pound Swiss Chard stems, cut into 4" long x ½" wide sticks
non-stick cooking spray or butter
2 Tablespoons bacon fat (or use butter)
1 ½ Tablespoons flour
1 ½ cup milk (2% or whole)
1 pinch nutmeg
large pinch of black pepper
salt (not much if using bacon fat)
¾ cup grated Swiss cheese, like Jarlsberg or Gruyere
2-3 sliced cooked bacon, diced (optional)
Preheat oven to 350°F. Grease a large gratin pan with cooking spray or butter. Set aside.
Bring a large pot of salted water to boil. Cook chard in boiling water for 5 minutes. Drain and chill with cold tap water. Set aside to drain while you make the Bechamel sauce.
Heat bacon fat in a medium saucepan. Stir in flour and cook for a couple of minutes. Slowly add milk and whisk to prevent lumps. Keep whisking until sauce thickens slightly, about 5 minutes. Add nutmeg and black pepper. Taste for salt (bacon fat will add a bit of salt); add more if needed. Remove from heat and whisk in ½ cup Swiss cheese until it has melted into the sauce.
To assemble gratin, spread chard stems in pan in an even layer. Sprinkle on diced bacon, if using. Pour sauce evenly over chard. Sprinkle on remaining ¼ cup cheese. Bake for 30 minutes until bubbly around the edges.
Adapted from Vegetables by James Peterson, William Morrow and Company, 1998.
Thursday, November 7, 2013
Mark Bittman's Memorial to Marcella Hazan

If you haven't yet, check out Mark Bittman's memorial to Marcella Hazan in The New York Times Magazine. I posted Marcella's recipe for pesto soon after her death in late September. I never met the woman, so have no memories to share besides my enjoyment of her cookbooks. But Bittman did get to cook with her and he shares some lovely memories, enough to give you the sense of this methodical and opinionated Italian cook who taught many of us about real Italian cooking. He went to Florida and cooked with her only weeks before her death. What a lucky guy.
Tuesday, October 29, 2013
Chunk Pickles

The verdict is in (on the pickles I made back in August). These are delicious. Sweet and spicy. Nice tang and good crunch. One reason I like this recipe is you can use any size of cucumbers, not just pickling cukes. My garden isn't big enough to produce enough pickling cukes at once (I hope to change that next year when I take out a tree to get more sunlight on my garden). The original recipe calls for alum. Alum is not added to pickles anymore, so I've left it out. I also up'ed the amount of syrup. The original recipe didn't make enough to fill all the jars. I left the proportions the same.

Chunk Pickles
(makes about 5 pints)
Tuesday, October 15, 2013
Chocolate Zucchini Cake

Zucchini bread, the classic way to use up too much zucchini from the garden. Or your neighbor's garden. But, my zucchini plant was chewed up by a squirrel, then yanked up by a deer who didn't even have the decency to eat the thing. So, definitely a zucchini shortage in my house this summer. A friend of a friend bestowed an overgrown zucchini so I was able to test out a new chocolate zucchini "cake." I have a recipe that is a bit out of control - too much sugar, too much fat, and too much cake unless you are bringing it to a large gathering. But, I like the concept.
The first time I baked this, I used a loaf pan (see picture above). But, it's so moist and soft that it really works better in a square cake pan. It also bakes up faster because it has spread out more.
I used Dutch cocoa the first time, which results in a darker color and a richer chocolate flavor. The second time, I used natural cocoa (most commonly seen as Hershey's cocoa). The color is lighter as is the flavor. Feel free to try it either way. Both are good, as my husband and friends will attest.
If you end up using a baseball bat zucchini, don't grate up the center part with the seeds. Just use the fleshy outside layer.
If you are baking this cake at sea level (I live at 5400 ft above sea level), increase the baking powder to 1 teaspoon, which is my best guess on the correct amount for you flat-landers.
Chocolate Zucchini Cake
(serves 9-12)
Tuesday, October 1, 2013
Marcella Hazan: 1924-2013

I have both The Classic Italian Cook Book and More Classic Italian Cooking. The recipes are simple, yet detailed, and delicious. Mrs. Hazan lived in Emilia-Romagna as a child but her books are a trip through all the regions of Italy. She has a recipe for Meat Sauce, Bolognese Style, from her home region, as well as five recipes for Polenta which she says was the "staff of life" in much of Lombardy and all of Venetia (the northeast corner of Italy), and Hothouse Lamb, Roman Style from Rome, naturally. Many Italian regional books have followed - I have a lot of them - but Mrs. Hazan was the first. And she'll always be the greatest for me.
Later this week, really cold weather is moving in. It's likely that Boulder will experience the first hard frost of the year. (We already had a light one last Friday night.) That means I must pick all the basil and make pesto. That's about as Italian as you can get, isn't it? Today, everyone knows pesto and it is well-loved in the US. But, back in 1973 when the first printing of The Classic Italian Cook Book came out, very few Americans had ever eaten or heard of pesto. It's from a rather obscure region of Italy: Liguria. Well, not obscure anymore. The Cinque Terre, that string of five marvelous towns clinging to the steep hillsides, is in Liguria. There are lots of riffs on pesto these days: different herbs, different nuts, different seasonings. Marcella Hazan's recipe is a departure too, as she explains in the introduction: "The old traditional recipes do not mention pine nuts or butter. But modern pesto invariably includes them, and so does this recipe." I ate pesto in a traditional restaurant in the Cinque Terre. It did include pine nuts, but definitely not butter. And no black pepper - they were particularly adamant about no black pepper. Mrs. Hazan does not use black pepper either.
The recipe is written just as it is in the book so you can see how thorough she was describing how to make something as simple as pesto.
My notes on the recipe: I don't need that much salt in my pesto. Half a teaspoon is enough for me. Your mileage may vary.
Blender Pesto
(Enough for about 6 servings of pasta)
2 cups fresh basil leaves (see note below)
½ cup olive oil
2 Tablespoons pine nuts
2 cloves garlic, lightly crushed with a heavy knife handle and peeled
1 teaspoon salt
½ cup freshly grated Parmesan cheese
2 Tablespoons fresh grated Romano pecorino cheese
3 Tablespoons butter, softened to room temperature
Put the basil, olive oil, pine nuts, garlic cloves, and salt in the blender and mix at high speed. Stop from time to time and scrape the ingredients down toward the bottom of the blender cup with a rubber spatula.
When the ingredients are evenly blended, pour into a bowl and beat in the two grated cheeses by hand. (This is not much work, and it results in more interesting texture and better flavor than you get when you mix the in the cheese in the blender.) When the cheese is evenly incorporated into the other ingredients, beat in the softened butter.
Before spooning the pesto over pasta, add it to a tablespoons of the hot water in which the pasta boiled.
Note: The quantity of basil in most recipes is given in terms of whole leaves. American basil, however, varies greatly in leaf sizes. There are small, medium, and very large leaves, and they all pack differently in the measuring cup. For the sake of accurate measurement, I suggest that you tear all but the tiniest leaves into two of more small pieces. Be gentle, so as not to crush the basil. This would discolor it and waste the first, fresh droplets of juice.
Thursday, September 26, 2013
Adventures with Bison Liver: Mushroom and Liver Pate

A dear friend of mine has an unusual perk at her place of employment: access to bison meat. Because I have room in my freezer, I have a bit of it stashed in my chest freezer, including a heart and a tongue. The liver was in there too, but I saw a recipe for a wild mushroom-liver paté and I had to break into the liver. I had picked some wild mushrooms (don't worry - you don't need to pick your own wild mushrooms to make this) which would be perfect for mushroom-liver paté. I've never used bison liver but how different could it be from beef liver? Actually, it's even better than beef or calves liver, mild and sweet. Now, I don't expect you to find a bison liver either. This recipe will work with any type of liver, including chicken livers. The mushrooms mellow the liver-y flavor. It's rich and delicious. The recipe makes quite a bit, so it's best made for a party. Unless you plan on eating it on everything. I'll be posting a recipe I created to use up some of this paté soon.
Mushroom and Liver Paté
(makes about 2 cups)
Friday, September 20, 2013
Kimchee Quesadilla

It was quite tasty and very easy, provided you can get kimchee. That's not so very hard. I saw it for sale in a small supermarket in Ithaca, New York recently. If they have it, I bet you can find it almost everywhere now. My kimchee came from Pacific Ocean Marketplace in Broomfield, CO. POM, as we call it, is a supermarket-sized Asian full-service grocery store. They cover nearly all Asian cuisines: Chinese, Thai, Vietnamese, Indian, Japanese, Korean and more. They have locally made kimchee. It's garlicky, and spicy, and not too, too funky. Also rather addictive. It was perfect for my homemade kimchee quesadilla.
Kimchee Quesadilla
(serves 1-2 as an entree, 4 as a snack or appetizer)
Wednesday, September 11, 2013
Baking Challah

I used a recipe from Baking with Julia, by Dorie Greenspan and based on recipes from Julia's (as in Child) PBS series from the 90's called Baking with Julia. I made it in my stand mixer which I strongly recommend. First, the recipe makes 2 large loaves and that's a lot of dough to knead. Second, challah is a sticky dough to knead and the stand mixer makes it much easier. One thing I like about Julia's recipe is the instruction to save some of the glaze to brush the loaf partway through the baking. If you skip this step, you'll have lighter parts at the seams between the sections because of the expansion during baking. Glazing it again gives your challah an all-over tan. :-)
Here's a link to the recipe from an archive out there. Scroll down to the message from Lisa3575.
Sunday, September 8, 2013
Roasted Corn and Peach Pancakes

Peach and Roasted Corn Pancakes
(serves 4-6)
Wednesday, August 28, 2013
Cooking Cucumber: the French Way
 |
| Cucumbers - at least one plant in my garden every summer |
The basics remain the same: you need to draw out much of the water in the cucumber before baking it. Otherwise, you end up with soupy boiled cucumber, which isn't all that appetizing.
Baked Cucumber with Cream
(serves 4-6)
6 medium cucumbers
2 Tablespoons white wine vinegar
⅛ teaspoon sugar
1 ½ teaspoon salt
2 Tablespoons unsalted butter
2 Tablespoons chopped fresh dill (or use basil or parsley)
⅛ teaspoon black pepper
3 Tablespoons heavy cream
more black pepper
Peel the cucumbers and cut in half lengthwise. Scoop out the seeds with a spoon. Slice the cucumbers the long way into about ½" slices. Then cut into 3" pieces. Place in a large bowl. Sprinkle with vinegar, sugar, and salt. Mix and let sit for 30 minute to an hour. Drain, pour onto a towel, arrange in a single layer then pat dry with another towel. You want the cucumber pieces dry so they cook up crisp.
Preheat the oven to 375°F.
Melt the butter with the fresh herbs and ⅛ teaspoon black pepper in a small saucepan. Place the cucumbers in a large shallow baking dish - large enough so the cucumbers are in a single layer. Pour over the melted butter and mix. Place the baking dish in the oven and bake for 50 minutes, stirring a few times during the baking. Remove from oven. Stir in cream and additional black pepper, if desired. Serve immediately.
Adapted from Mastering the Art of French Cooking: Volume One - Julia Child, Louisette Bertholle and Simone Beck, Borzoi, 1961.
Friday, August 23, 2013
Making Pickles

My latest project...called chunk pickles. An old recipe from a book called Preserving in Today's Kitchen by Jeanne Lesem, where "today" is circa 1985. The description says the recipe is way older than 1985, however. I've found lots of great recipes from this book: the recipe for quick dills on my School of Eating Good blog is from the same book. These are not quick pickles. They need to sit for about a day and a half in salt water, get packed in jars, heated (though not actually canned), and covered in brine. Then they sit for 2 months. So, no recipe for these since I have no idea how they are going to turn out. Come back in mid-October to find out.
Tuesday, August 20, 2013
Reflections on a Week in Montreal
 |
| Scenes from Montreal (clockwise from upper left): Asian spiced salmon with a spicy slaw, classic row houses, local strawberries at Marche Jean-Talon, amuse bouche, paella burners and Serrano ham, the Arts Complex, me at the Botanic Gardens, Montreal waterfront |
I visited Montreal in early July with a few of my college friends. We went for the Jazz Festival. If you are a lover of great music, you should try to get there during the Montreal Jazz Festival. It's fantastic. While you are there, you will eat well. Really, really well. Like Toronto and Vancouver, Montreal is a foodie paradise. It is every bit as multicultural as these other large Canadian cities but it feels like you are in an old European city. Besides the food, you can enjoy fantastic museums, a world-class Botanic Gardens, and go to the top of the tower built for the Olympics in 1976. There is great shopping, a beautiful and charming historic Old City, and close proximity to the deep forests of Quebec for hiking in the summer and skiing in the winter. Or visit Parc Mont-Royal, where you can see those forests within the city.

Bringing this back to food, those forests produce the most maple syrup of any place in the world, 80% of all maple syrup. Not surprising given that the sugar maple is a Northeastern native and Quebec has a whole lot of maple forest. We visited the Maple Museum in the Old City, full of all things maple syrup. I bought a cookbook (of course!), Cooking with Quebec Maple Syrup by Anne Fortin. It is filled with maple recipes from the traditional to the cutting edge from some of the finest restaurant kitchens in Montreal. I can't wait to try out a recipe for lamb shanks au parfum d'erable.

Montreal boosts an impressive array of ethnic restaurants: Cambodian, Venezuelan, Portuguese, Greek, Ethiopian, Thai, Korean. The list goes on and on. There is a small Chinatown with excellent Asian shopping. I even found rambutans, my daughter's favorite fruit:

We spent a morning at the Marche Jean-Talon, one of three large everyday produce markets. Produce comes from Quebec and all over the world. Of course, I had to find the wild mushrooms, and I found some very wild ones, indeed!

Here are a few more images from the market. Frankly, I could have spent all day there!

We had a truly cross-cultural experience in a Korean restaurant, a kimchee quesadilla! It wasn't terribly spicy but quite tasty and makes the perfect post-bar snack. We enjoyed a French meal at Cafe Cherrier. I had a Toulouse sausage. I'm not sure what the sausages from Toulouse are supposed to taste like but it was delicious and moist, accompanied by perfect pommes frites (as one would expect at a French cafe). We found out-of-this-world pastry at Mamie Clafoutis. Not exactly French pastry, it definitely had a French-Canadien spin to it. They earned their French creds turning out baguette worthy of any Parisian boulangerie. We enjoyed excellent gelato; traditional Belgian moules (as well as curried mussels, Thai-style mussels, and Provencal-style mussels), frites, and local beer; Portuguese live-fire grilled sardines with piri-piri sauce; and when in Montreal, you must try the smoked meat. Smoked meat is cured, spiced, smoked fatty brisket and it's sort of like pastrami but it has its own special spice blend. I recommend it highly, but if you like your meat lean, it may give you a scare. As my Jewish grandmother would say: "Live a little. A bit of fat never killed anyone." :-)
 |
| Clockwise from the upper left: Kimchee quesadilla, Schwartz's Deli, what a selection of salami/saucisson/cured meat, moules, Schwartz's window full of smoked meat, Toulouse sausage and frites |
Below are the names and addresses of all the places I remembered to keep track of, if you are lucky enough to find yourself in Montreal in the future.
Pagliacci Bistro Gelati
125 Rue Prince-Arthur E for gelato
Cafe Cherrier
3635 rue Saint-Denis for reasonably priced French
Mamie Clafoutis
3660, rue Saint-Denis for amazing pastry and bread
Bieres et Compagnie
4350 St Denis, for moules frites and an excellent selection of beer on tap
Schwartz's
3895 Saint-Laurent Blvd for the best smoked meat
Bob & Mariko's B&B
3458 Avenue Laval, I would stay here again. Great hosts and a great location!
Marche Jean-Talon
7070 Avenue Henri Julien
Fairmount Bagels
74 rue Fairmount Quest
Monday, July 15, 2013
Beer Can Chicken, without the Beer

We really like beer can chicken, where you prop a whole chicken on a half-full can of beer or some other liquid enhanced with some aromatics. You also rub the chicken with a dry rub to make it extra yummy. It's a rather foolproof method for chicken because you cook it using indirect heat. The chicken sits off to the side of the hot element (or if you have a charcoal grill, away from the live coals) so you don't need to worry about flare-ups. Flare-ups are the bane of chicken grillers. With this method, you can set it and forget it for about an hour.
I have a can holder that provides a bit more support so the bird doesn't tip over. It's not that hard to balance the chicken on the can (you shove the can up the bird's butt and balance it on its legs and the can) but the can holder makes it really easy. Here's what it looks like without the chicken and can in place.

Though beer can chicken is traditional, many other liquids are used to add flavor and moisture. This recipe is from Beer Can Chicken and 74 Other Offbeat Recipes for the Grill by Steven Raichlen. Raichlen is one of the giants in the field of BBQ and grilling. I have a bunch of his books and they are all fantastic: comprehensive, detailed, and full of delicious recipes. The North Carolina pulled pork recipe I posted a couple of years ago is from his excellent BBQ USA. If you are into grilling, BBQ, and live fire cooking, you need his books. I met him here in Boulder during a book signing, and he's a real nice guy too!
This recipe calls for peach nectar but I didn't have any. I used guava nectar. That works too. So, feel free to substitute apricot, guava, or mango nectar instead of the peach in both the can liquid and the sauce. The sauce reminds me of the duck sauce we used to get when we ordered spareribs at the Chinese restaurant. It's pretty sweet but totally addictive. It would also be delicious as a glaze on salmon.
Peach Nectar Chicken
(serves 4-6)
2 teaspoons brown sugar
2 teaspoons sweet paprika
1 teaspoon kosher salt
1 teaspoon finely ground black pepper
1 teaspoon garlic powder
1 teaspoon ground cinnamon
¼ teaspoon ground cardamom
12 ounces peach nectar (or some similarly fruity nectar like guava or mango)
1 3" cinnamon stick
1 chicken, 3 ½ to 4 ½ pounds
2 cups of fruity wood chips (applewood or grape prunings)
Place the wood chips in a bowl and cover with water. Soak for at least 30 minutes and up to an hour.
Combine the brown sugar, paprika, salt, black pepper, garlic powder, cinnamon, and cardamom in a small bowl and stir to mix.
Measure out ¾ cup of peach nectar into a small saucepan for the BBQ sauce. Make 2 extra holes in the top of the can with a church key type opener. Put the cinnamon stick in the can and set aside.
Remove the giblets from the cavity of the chicken. Blot the inside and outside of the chicken dry with paper towels. Sprinkle about 1 teaspoon of the rub in the body cavity. Sprinkle ½ teaspoon of the dry rub in the neck cavity. Sprinkle 1 Tablespoon of the rub on the outside of the chicken. Spoon the rest of the rub into the can. Place the chicken on top of the can. If using the can stand, put the can in the stand, then the chicken on the can. Tuck the wings behind the chicken's back.
If using a gas grill, turn one or two elements on to high and leave one element off. That's where the chicken will go. If using a charcoal grill, get a batch of coals hot and when they are glowing, push them all off to one side. Drain the wood chips and put in a metal pie plate covered with foil and punched with a few holes or the smoker box. Place the chips on the hot side of the grill to get them smoking. Once the chips get smoking and the grill is hot (350-400°F), reduce the temperature to medium so you maintain the temperature, and place the chicken on the side of the grill that is off (or without any coals). Cover and cook for 1 ¼ to 1 ½ hours until the internal temperature in the meaty part of the thigh registers 180°F. While the chicken is cooking, make the Peach Barbecue Sauce.
Peach Barbecue Sauce
¾ cup peach nectar (that you put in the saucepan above)
½ cup ketchup
2 Tablespoons peach or apricot preserves
1 Tablespoon honey
1 Tablespoon Worcestershire sauce
1 Tablespoon dark rum
½ teaspoon soy sauce
1 teaspoon liquid smoke
¼ cup water
salt and pepper to taste
Put all the ingredients except the salt and pepper in the saucepan with the peach nectar you reserved from above. Heat over medium-high heat and bring to a boil. Reduce the heat to medium and simmer until thick. Add salt and pepper to taste. Serve warm or at room temperature with chicken. Store any leftover sauce in the fridge for up to 1 week. Reheat before serving.
Monday, June 24, 2013
Fresh Apricot Preserves

If I find decent apricots on sale, I buy a bunch of them and make apricot preserves. In previous years, I've made apricot butter, but preserves are less work. They taste just as good. Jams and preserves contain a lot of sugar. That's because the sugar is a preservative. So, don't be tempted to reduce the sugar. There are low-sugar jam recipes out there and if you want to cut back on the sugar, use them. Don't tinker with the high-sugar recipes.
You can "can" it, water processing the preserves in jars. I have tended towards the lazy person's method of preserving since getting my chest freezer. I put the preserves in freezer containers and they keep just fine in the deep chill. There's nothing better than pulling out a bit of summer's golden sunshine in the middle of winter. This stuff makes a great gift too, in which case you will want to preserve it because frozen jam doesn't ship well. ;-)
Fresh Apricot Preserves
(makes about 3 ½ cups)
3 cups coarsely chopped fresh apricots, about 2 pounds
3 ½ cups sugar
¼ cup fresh lemon juice
Stir together all the ingredients in a large stainless steel, glass, or plastic bowl. Cover and let sit at room temperature for 12 hours, stirring occasionally.
Scrape out the apricot mixture into a dutch oven or large saucepan. Bring to a boil over high heat, stirring frequently. Reduce the heat to medium and boil rapidly, uncovered, until mixture is thick and gels on a cold spoon.
Pour into freezer containers for long term freezer storage or put into sterilized jars and water-process for 5 minutes (15 minutes at Boulder altitude).
If you are not familiar with home canning, get yourself a good book that explains the process. This recipe came from Small-Batch Preserving by Ellie Topp and Margaret Howard. It's an excellent book for modern home cooks on preserving, both for the process and for the recipes.
Wednesday, June 19, 2013
A Vineyard Odyssey
 |
If you dream of moving to the country and owning a vineyard, or if you love wine and have an interest in learning how the front-end of this process works (because great grapes make great wine), this is a book for you.
Order the book from Amazon with this link and Deb & John get a little extra on the sale: A Vineyard Odyssey
Sunday, May 26, 2013
Watermelon Sorbet

You ever buy a lame watermelon? You know the kind - it tastes more like cucumber than melon or maybe it's started to go soft and mushy. And, you wonder "what can I do with this?" If you have an ice cream maker, turn it into sorbet. The sugar, which is essential to create a good texture in a sorbet, helps immeasurably. Of course, if you bought a beautiful watermelon like the one in the photo, your sorbet will be even better!
You can use watermelon with seeds but it's a lot more work to remove all the seeds. Nowadays, seedless watermelons can be had easily, and this is the way to go. In my local supermarket, most of the mini-watermelons weigh in at 3 ½ pounds. I've scaled the recipe to use one mini-watermelon, which makes a bit less than 1 quart of sorbet.
Very refreshing!
Watermelon Sorbet
(makes not quite 1 quart)
Friday, May 17, 2013
Castelas Ginger Olive Oil
 |
| Food souvenirs from my trip to Provence. |
 |
| Pont-du-Gard. It's big. Really big. |
 |
| Looking up at Les-Baux-de-Provence. The castle and the town are a step back in time. |

We got a tour of their facilities. The picture above is the display to their fancy Italian olive oil press. Of course, no tour would be complete without a visit to the gift shop, where they sell their olive oils, olives, soaps, and candle (both made with olive oil). They let us sample their olive oils and they were absolutely delicious. The black fruit olive oil, pressed from ripe black olives, is very smooth with a background flavor of hazelnuts. It is incredible stuff.
But, the really special oil is the Ginger Olive Oil. It is not an infused oil. The ginger is pressed with the olives and the pure ginger flavor is unique. I have tasted every ginger olive oil I could find since I visited Castelas and nothing even comes close. A little goes a long way when used as a finishing oil. It enhances fish, or chicken, and makes a wonderful vinaigrette.
Something this special doesn't come cheap, of course. Well, if you are in Les-Baux, it's pretty reasonable. Unfortunately, I have no plans to visit Provence this year, so I need to order it from the source. Shipping is more expensive than the oil, but it's worth it. Indulgent, yes. But, I don't often splurge on things like this.
You can visit their main website or go straight to the Castelas store (in English) to order some of this exceptional olive oil. I would not wait too long. Last year, when my stash was getting low, I went looking for it and it was all sold out. I've been conserving it ever since. I ordered two 250 ml cans and they should get here next week. Let the olive oil flow!
Friday, May 10, 2013
Experience with Oxtails

Oxtails are one of those cuts that really need a lot of patience. The meat is very tough because it gets a lot of use (watch cattle - they swish their tails all the time) and there is tons of connective tissue holding it all together. That means you will be cooking them for a long, long time.
I tried cooking them in my slow cooker, which I guess would work if you cooked them long enough. I tried about 8 hours. Definitely NOT long enough. Next time, I'll try overnight and through the day.
Why bother with oxtails? They taste so very good, especially when given the Chinese treatment. I adore star anise which is kind of odd since I hate licorice. Some things are unknowable. :-)
Chinese Braised Oxtails
Start with about 1 ½ pounds of oxtails. This is enough to feed 6 if you don't expect to get a lot of meat. The oxtails give up their collagen, making for a very rich broth. So high in collagen, in fact, that the sauce gels when it is chilled. This is good stuff and makes are a delicious sauce.
Place the oxtails in a dutch oven. Add 5 whole star anise pods, 1 4" stick of cinnamon, about a dozen whole black peppercorns, 3 Tablespoons dark or black soy sauce (these are thicker and have some molasses or sugar added), and 2 Tablespoons of sugar. Stir in enough water to nearly cover the oxtails. Heat over medium heat until it starts to boil, then reduce the heat to maintain a simmer, covering partially. Cook for a very long time, like 4 hours until tender. You can't really overcook them. Check the water level and add additional water if most of it cooks off.
You can serve the oxtails whole but I like to remove most of the meat so that it becomes part of the sauce. This is a rather time-consuming process, however. First, take all the oxtails out of the sauce and allow them to cool on a sheet pan until you can handle them. Pick as much of the meat off the bones as you can and add it back to the sauce. While the oxtails are cooling, strain out the star anise, peppercorns, and cinnamon, then crank up the heat on the sauce. You can reduce it as much as you like, until is quite syrupy (again, have patience). When it starts to get thick, reduce the heat so that it doesn't burn. Adjust the salt after you have reduced it. Add the bones back too because if you love oxtails, you'll want to suck all the goodness off of them. And the sauce adds lots of extra goodness.
The meat and sauce only improve if you chill it all and then reheat it. Great served over noodles.
Tuesday, April 23, 2013
"Rice with Things"

I'm a big fan of Mark Bittman. I have 6 of his cookbooks, all solid. I'm sure part of what I like about him is his unabashedly New York attitude (I'm a native New Yorker). He's not a purist when it comes to food, another thing I appreciate. And, he's willing to break with tradition even if the purists are out there, just waiting to tut-tut about him monkeying with a classic. A classic like Paella.
Paella is the traditional rice, chicken and seafood dish of Valencia. My daughter enjoyed true Paella last summer when she visited Valencia and said it was very good. Lucky kid. I have never had the true Paella so I don't know what I'm missing. But, I do know that chicken and seafood cooked with short grain rice in rich broth is good stuff.
I live over 1000 miles from the closest ocean/sea. The odds of me recreating an authentic Paella are pretty slim anyway. Not only is the sea very far away, but cooking short grain rice just right this way at 5400 feet is tricky. You need to tweak the liquid amount and time in Bittman's (or any other) Paella recipe. If you are making this at altitude, plan to add at least ½-1 cup more liquid and you'll need to cook it for an extra 10 minutes, I found. If you are adding seafood, which can easily overcook, don't add it until 20 minutes in. To get the crust without burning (yes, mine burned just a bit, but still quite edible), you will need to reduce the heat because you will be cooking it longer. Bittman's recipe says "if you smell it burning..." I didn't smell it burning but I can guarantee it will burn if you cook it on medium-high for 30 minutes!
You can find the recipe on the New York Times site along with an helpful article by Bittman. If you want to see how impassioned people can get about him tinkering with a classic, check out the comments!
I could have used chicken broth, but I had a bunch of shrimp shells in the freezer, just asking to be made into stock. Makes a great shellfish stock that is perfect for rice with things. Here's the recipe, from Bobby Flay's Boy Meets Grill. It's very easy and you can stick it in the freezer, ready for the next time you want to be transported to Valencia. :-)
Shrimp Stock
(4 to 5 cups)
Friday, April 12, 2013
Slow Cooker Lamb Shanks with Figs and Shallots
 |
| Lamb shanks served with sweet potato pancakes, mostly because they were leftover from the night before |
It's still slow cooker weather here in Colorado. We got a foot of snow on Tuesday and next Tuesday is shaping up to be more of the same. Time to break out the lamb shanks! Regular readers will remember my post on Scotch Broth and my cache of lamb in the freezer. This is a richly flavored dish that is so, so easy, thanks to the slow cooker.
Slow Cooker Lamb Shanks with Figs and Shallots
(serves 4)
Saturday, March 23, 2013
Oatmeal Rye Irish Soda Bread with Herbs

Pulled this recipe from my local paper. Not sure where they got it from since there is no attribution on the recipe. Wherever it came from: kudos! It's delicious and for a great bonus, it's 100% whole grain. I made it for St. Patty's Day to go with the corned beef and cabbage, but this is so good, you want to make it year round. I know I will.
Oatmeal Rye Irish Soda Bread with Fresh Herbs and Walnuts
(serves 12)
Passover is Almost Here

I know the vast majority of you out there are not Jewish and therefore don't care about Passover as a holiday. But, believe me, there is some really good food served on Passover. I'm going to try to get recipes out for a number of my all-time favorite Passover recipes real soon. For now, you'll have to be satisfied with my menu and a link to my Southwestern Matzoh Ball Soup which I posted a couple of Passover's ago.
Passover Dinner 2013
- Spinach-Matzoh Pie, a recipe from my mother-in-law. It's a Sephardic dish.
- Southwestern Matzoh Ball Soup, recipe originally from rec.food.cooking.
- Barry Wine's Stringed Beef Brisket served with a Spicy Roasted Tomato Sauce, from Joan Nathan's The Jewish Holiday Kitchen)
- Matzah "Salad," The Jewish Holiday Kitchen
- Moroccan Coconut-Sabra Torte, The Jewish Holiday Kitchen served with a spiced blood orange sorbet from The Ultimate Ice Cream Book by Bruce Weinstein
Monday, March 18, 2013
Fresh Bread

It's hard to beat bread baked at home. After fancy cakes, home baked bread and rolls usually get the most oooh's and ahh's from my guests. People don't bake bread at home anymore (my friend John, the uber-baker and vineyard owner, and Jenny of La Poeme, excepted) so if you go to the trouble of baking your own bread, your guests really appreciate it.
For years, I had a bread machine and I regularly made bread at home. The motor croaked a couple of years ago and I have gotten out of the habit of making bread at home. I'm trying to fix that. I still take the lazy way out by using my big KitchenAid mixer. If you want to make it by hand, all power to ya!
The loaf pictured above is a recipe from Pie in the Sky by Susan Purdy, a high altitude baking book, which I mentioned in my recent post of cream cheese brownies. Though it has adjustments for higher altitudes, all the way up to 10,000 ft (if you happen to live in Silverton, CO), this is not just for high-altitude bakers because all the recipes are adjusted for sea level and up. So, if you live in NJ, it's still a great book. I heartily recommend it.
Grassy Creak Multi-grain Bread for 5000 ft above sea level
(makes one large boule)
Monday, March 4, 2013
Scotch Broth
 |
| Not the prettiest soup, but it does stick to your ribs |
I have a whole lamb in my freezer. No, not the whole carcass, but a whole lot of cuts of lamb. It was about 50 lbs. of cut lamb with some cuts that you don't usually find in the supermarket or even your local butcher. Things like lamb breast and neck slices. There isn't a lot of meat on neck slices but they are full of rich flavor. Time to make some soup!
There isn't a lot of meat in this. This is how those thrifty Scots stretched a little bit of meat. As I said, I used neck slices, but a meaty lamb bone from a leg of lamb roast would work great too. Just make sure there is some meat left on it to throw into the soup. It's full of vegetables and it gets its heft from a bit of barley and some yellow split peas. Great for a wet, chilly day. They have a lot of those in Scotland, I'm told.
Scotch Broth
(serves 8-10)
Thursday, February 28, 2013
Cream Cheese Brownies

I made these brownies mostly because I happened to have all the ingredients on hand and I needed a dessert for company. The recipe is from Let Them Eat Cake by Susan Purdy with some minor altitude adjustments for my mile-high location. I've put the original in too for you folks who are altitudanally challenged. :-) Also, I used full-fat cream cheese - because that is what I had. Purdy has written some of my favorite baking cookbooks: Have Your Cake and Eat it, Too (a healthier baking book like Let Them Eat Cake), The Family Baker, and an excellent high-altitude baking book called Pie in the Sky. Her recipes are well-tested and most are totally doable by novice bakers.
Cream Cheese Brownies
(makes 16, one 9x9" pan)
Saturday, February 16, 2013
French Fish Soup

Here's a simple, light fish soup but it's also hearty, full of veggies and chunks of fish. I made it with mahi-mahi but you could use halibut, bass, snapper, or shrimp. Its flavor is delicate - it's about the veggies and the fish.
French Fish Soup
(serves 4-6)
2 Tablespoons olive oil
1 clove garlic, minced
1 medium onion, diced
½ cup finely diced heart of celery, including some of the leaves
1 medium carrot, finely diced
½ of a medium green bell pepper, finely diced
1 teaspoon loosely packed saffron threads
1 teaspoon salt
½ teaspoon black pepper
½ teaspoon dried thyme
1 bay leaf
1 cup dry white wine
1 ½ cups unsalted chicken stock
1 ½ cups water
1 medium potato, cut into ½" cubes
1 ½ pounds fresh fish fillets, such as mahi-mahi or bass, cut into 1" chunks
½ cup chopped parsley
fruity olive oil for garnish
Heat the olive oil in a medium soup pot over medium heat. Add garlic and onions and cook until wilted but not browned. Add celery, carrot, green pepper, saffron, salt, pepper, thyme, and bay leaf. Stir and cook for a couple of minutes. Add wine, chicken stock, and water. Stir, cover and cook for 5 minutes. Add potatoes, cover, and cook for 10 minutes. Potatoes should be nearly done, but not quite. Add fish chunks, stir, cover again and cook for about 5 minutes, until fish is opaque all the way through - just done. Stir in the parsley, drizzle with a fruity olive oil if desired, and serve with crusty bread.
Adapted from The New York Times 60 Minute Gourmet, Pierre Franey, Fawcett Columbine, 1979.
Wednesday, January 30, 2013
Lamb Chops with Gyro Marinade
This recipe was inspired by my daughter who loves gyros. Gyros are a combination of ground meats, beef and lamb usually, with some nice herbs mixed in. I think the secret ingredients are lemon and a generous amount of garlic. I found a recipe in The New Look of American Lamb from the American Lamb Council (thanks Kasja!) for lamb gyros and ran with that. They turned out mighty tasty!
Lamb Chops with Gyro Marinade
(serves 4)
3 cloves garlic, minced or pressed
3 Tablespoons extra-virgin olive oil
1 ½ teaspoons dried lemon peel or the zest of 1 fresh lemon
¾ teaspoon dried basil
¾ teaspoon dried marjoram
1 ½ teaspoon dried rosemary
2 Tablespoons chopped fresh parsley
8 lamb rib chops or 4 lamb shoulder chops
salt and black pepper
Mix together garlic, olive oil, and lemon zest in a non-reactive pan that will hold all the lamb chops in one layer. Crumble up the dried herbs in your palm and add to the garlic mixture. Add the parsley and mix to combine. Put the chops in the dish and rub the herb mixture all over the lamb. Cover and refrigerate for up to 8 hours.
Season lamb chops with salt and black pepper. Broil or grill to desired doneness. We like our lamb medium-rare but you do what you got to do to keep your diners happy.
Tuesday, January 22, 2013
Yet another pretty Dessert photo

It's three tall layers of delicious mild chocolate cake with loads of coffee-caramel 7-minute icing. Very impressive - when you walk in the door, the guests all go "Oooh!" and "Aaahhh!" Even more ooohs and aaahhhs when they taste it.
People ask me if I like baking desserts best. Certainly, the adulation is lovely. I really love cooking, with baking another part of cooking. I don't really understand people who say they can't bake, especially great chefs/cooks. If you meet me, don't tell me you can't bake. You might not be able to bake this cake as your first (or even 10th) foray into baking, but you can bake. Takes a bit more attention to detail, but if you can follow a recipe, you can bake.
Subscribe to:
Posts (Atom)