New Location

You can find all the old content and new stuff too at worldplatterblog.wordpress.com

Sunday, December 26, 2010

Oh so rich Potato Gratin


I made this recipe for our Christmas dinner. It was a huge hit. Well, of course, it was! It's so darn rich you'd have to be crazy not to love it. I pulled this recipe from the New York Times Temporary Vegetarian column. My recipe below is adapted from the NY Times recipe since I found the cooking times in the original total fantasy. Sometimes I wonder if the recipes are tested. This recipe came from a restaurant chef, so I have to assume he did make it. But, I'm thinking something got lost in the translation to a recipe for home cooks.

As with my "slim" potato gratin recipe (see here), a mandoline makes the process of slicing the potatoes much easier. You can slice the potatoes by hand. They will probably come out a bit thicker and less even, but it will still work out ok.

Potato and Swiss Chard Gratin
(serves 10 - 12)

Adapted from DBGB Kitchen & Bar, Manhattan, via the New York Times

1 pound Swiss Chard Leaves And Slender Stems, stems cut into 1⁄4-inch cubes
2 ½ cups Heavy Cream
1 Garlic Clove, smashed
1 small Shallot, sliced
2 Thyme Sprigs
1 Bay Leaf
¼ teaspoon Freshly Grated Nutmeg
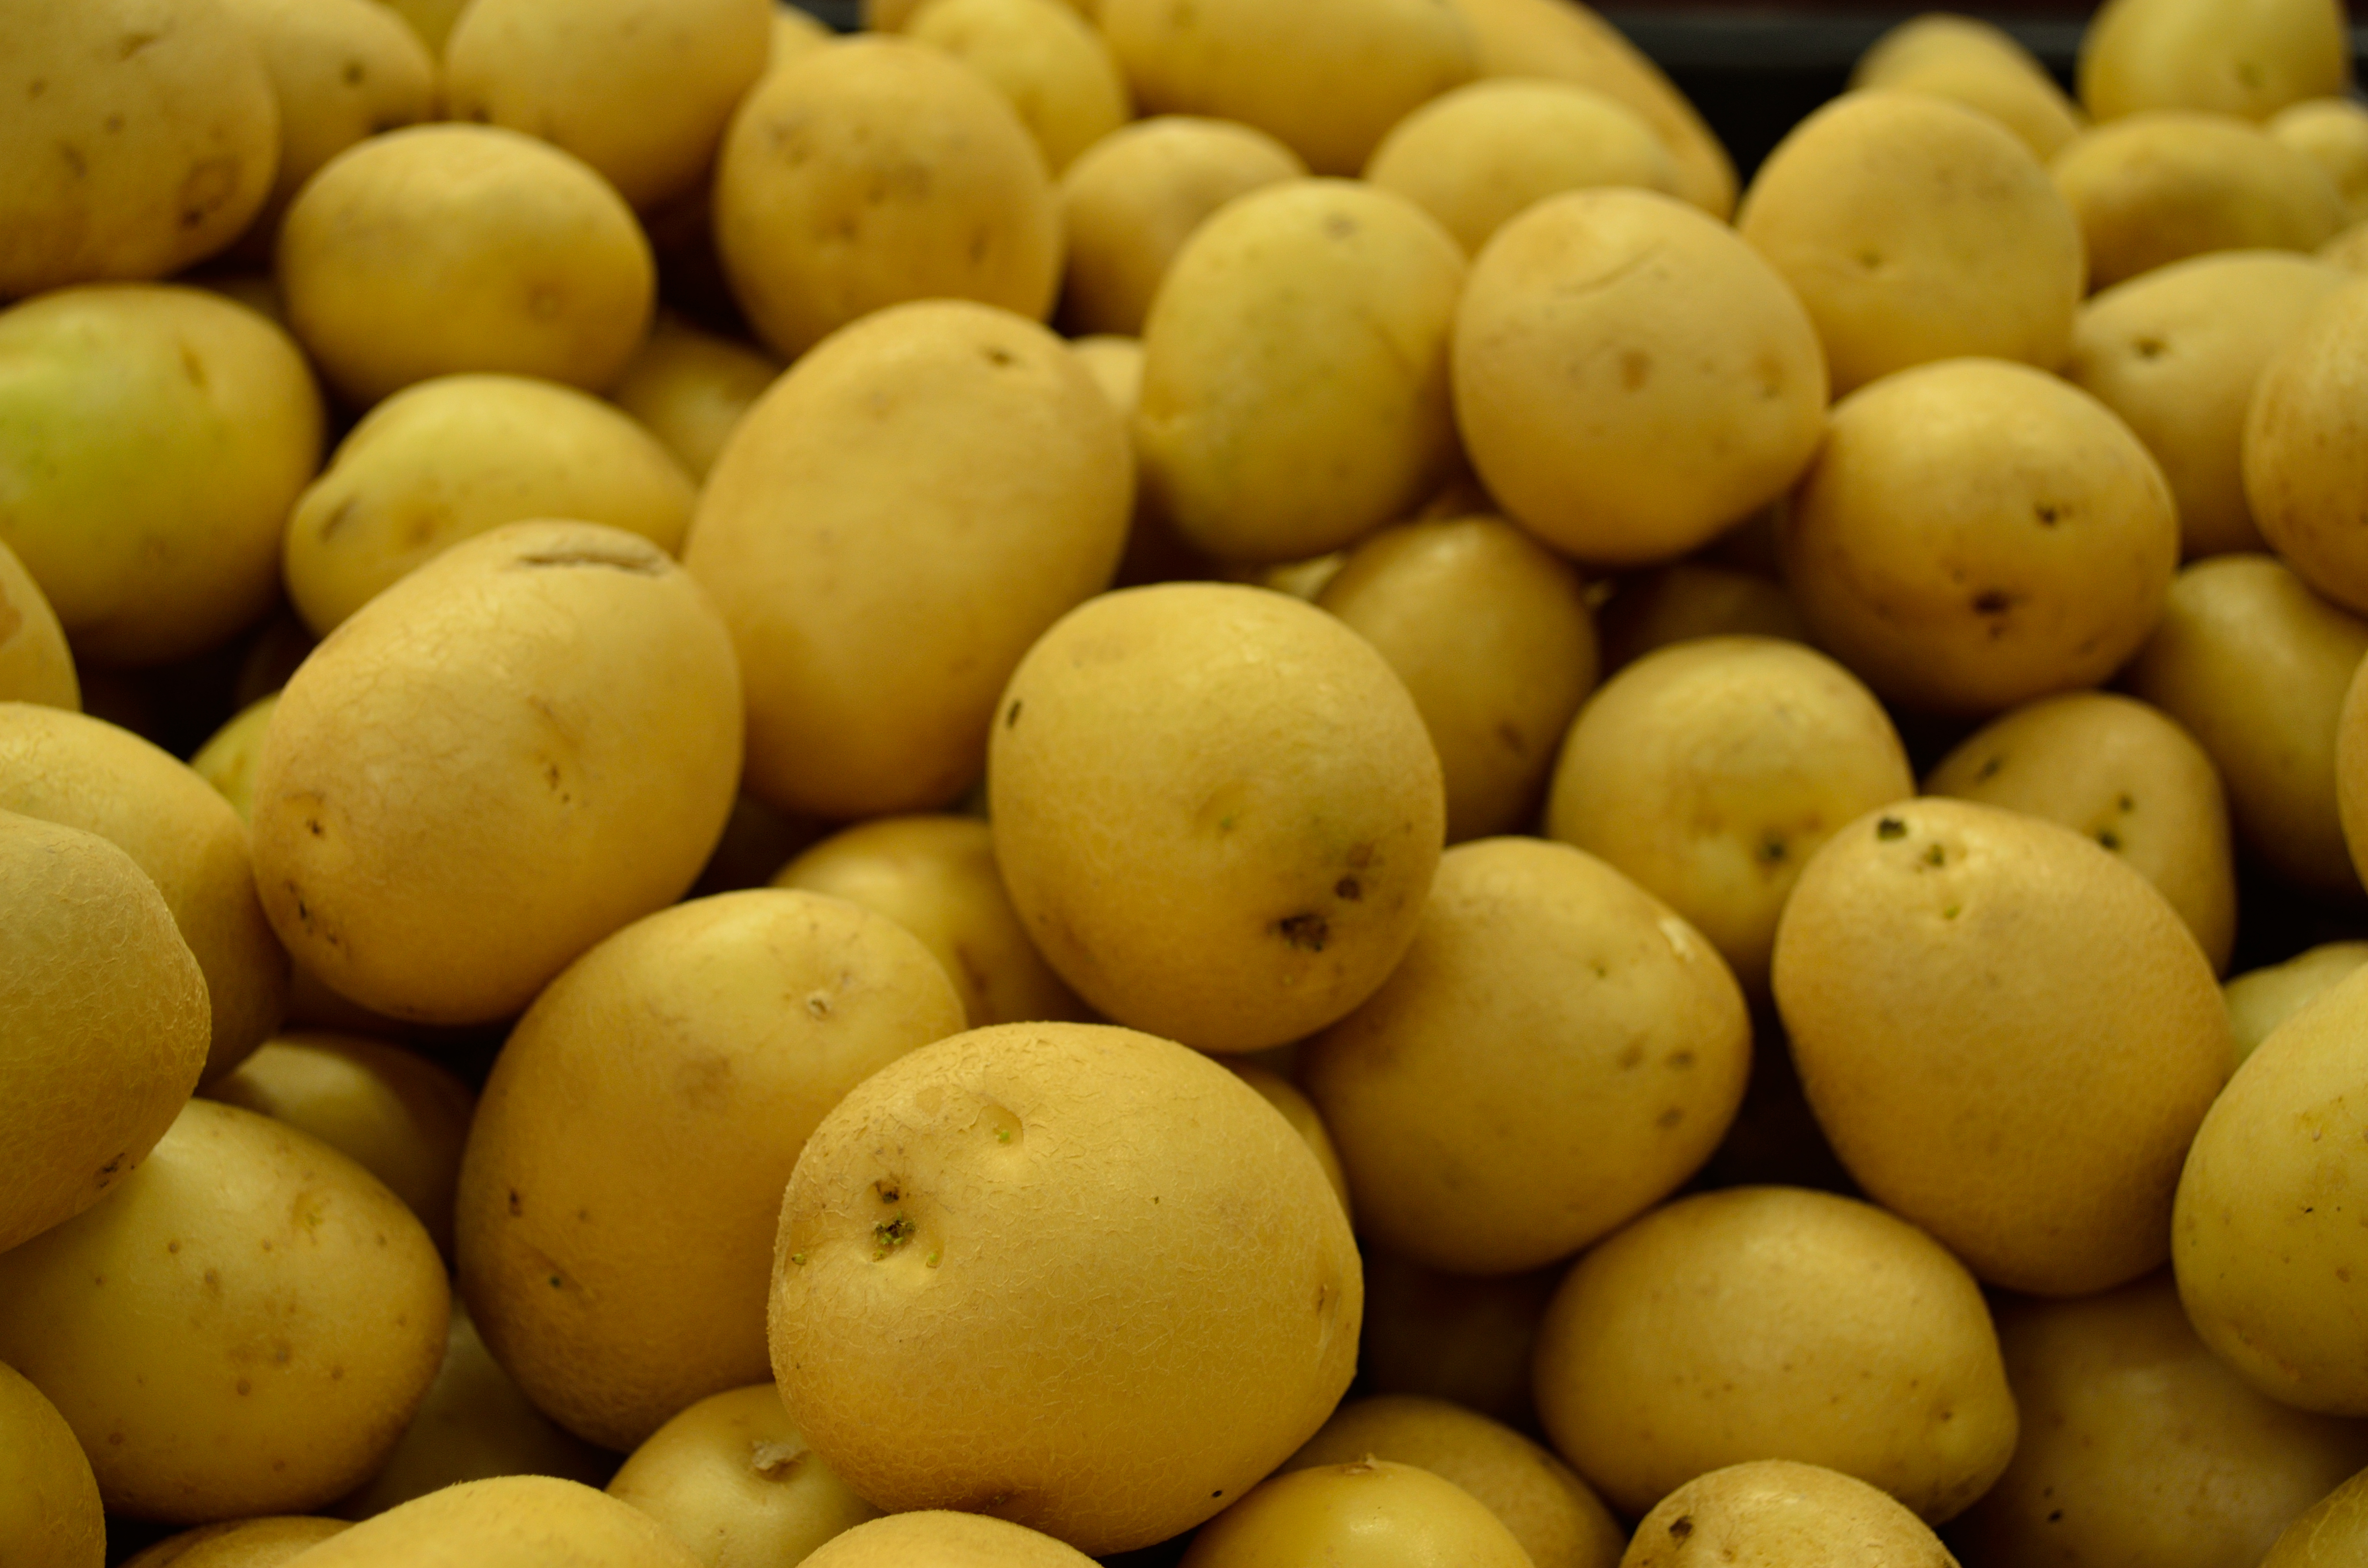
3 pounds (6 to 8 medium) Yukon Gold Potatoes, peeled
1 Tablespoon Butter, at room temperature
Salt And Black Pepper
6 ounces Grated Gruyère

1. Heat the oven to 350°F, and place rack in the center. Bring a large pot of lightly salted water to a boil; set a bowl of ice water on the side. Boil the chard leaves until tender, 3 to 5 minutes, then transfer with a slotted spoon to the ice water. Squeeze them dry and chop roughly. Boil the diced stems until tender, 3 to 5 minutes. Drain well and add to chopped chard leaves.

2. In a small saucepan, bring the heavy cream, garlic, shallot, thyme and bay leaf to a simmer over medium-low. Watch carefully because cream can boil over quickly. Reduce heat to low and simmer to reduce somewhat, about 30 minutes. Strain out the solids and add the nutmeg.

3. Meanwhile, slice the potatoes into ⅛-inch-thick rounds with a mandoline or sharp knife. Butter a 12- to 14-inch gratin dish or dutch oven. Make sure that it is at least 4" high. Start with a layer of one-third of the potatoes, overlapping the slices. Sprinkle potatoes with salt and pepper. Add half the Swiss chard,  and one-third of the Gruyère cheese. Dribble on one-third of the cream mixture. Layer on another third of the potatoes, salt and pepper, the other half of Swiss chard, and another third of the cream and Gruyère. Finish up with the rest of the potatoes, salt and pepper, the remaining cream, and the rest of the cheese.

4. Bake until the top is browned and the potatoes are fork-tender, about 1 hour, 15 minutes.

Sunday, December 12, 2010

Eating my way through New Orleans

Mid-Afternoon Beignet at Cafe du Monde


Frankly, we didn't get very far, eating our way through New Orleans. First off, we only had 4 days there and second, there is way, way too much great food to get through, even if you had months.

Full disclosure: I absolutely loved New Orleans. We had never been there before and I had heard many things about it, good and bad. Forget the bad. It's good. No, it's great. If you haven't been there, go. If you were there before Katrina, go back. I don't know if it's as good as before (certainly for many of the residents, it isn't, since some neighborhoods still haven't come back) but for tourists it's a blast. There is food, there is art, there is culture. And there are the people, who are just wonderful. Obviously, they are resilient. The owners of the B&B we stayed in moved back to the city about 5 weeks after Katrina. They had unreliable electricity for months. They had no potable tap water for 5 months! But, back they came and rebuilt their beautiful B&B in an historic neighborhood, the Faubourg Marigny, downriver from the French Quarter. (It's the Royal Street Courtyard. It's charming, lovely and a bargain.) New Orleans needs tourists. Help them continue to rebuild by going to visit them. You won't regret it.

On to the food. Because, one of the best reasons to go to New Orleans is the food. It's unique - lots of Creole (a combination of Spanish, African, French and American influences), as well as German, Cajun, French, American, well, most anything. New Orleans has always been a city of immigrants and it shows in its dining scene. We saw very few fast food chains in the city. These folks know good food and they have enough local fast food (can you say "po' boy?") that they don't want lousy hamburgers. Good for them! Here in no particular order are my favorite dishes.

Mussels in white wine at Adolpho's on Frenchman Street. Some of the meatiest, sweetest mussels I've ever had. Tons of garlic. Absolutely delicious. Adolpho's is Creole-Italian. Italian figures big in the Creole cuisine, but it's not really Italian. It's thoroughly New Orleans.

One of the best snacks in the world


Beignets and cafe au lait at Cafe du Monde. If you don't go to Cafe du Monde for this, you have missed one of the grand New Orleans traditions. Yes, tons of tourists there but who cares? The beignets are perfectly fresh, generously dusted with powdered sugar. Well, dusted isn't quite the right word. Buried, actually. The cafe au lait is excellent too. You have no excuse to miss Cafe du Monde; it's open 24 hours a day.


Praline bacon (with grits), callas, boudin balls


Praline bacon, callas, and boudin balls at Elizabeth's in the Bywater. The Bywater is the next residential neighborhood downriver from the Faubourg Marigny. Not a place you happen upon unless you went looking for it. But, you should look for it. Praline bacon is their signature dish - thick cut meaty bacon with a crust of brown sugar and pecans. The perfect combination of salty sweet piggy goodness. Callas are an old New Orleans recipe. They are sweet rice fritters and you rarely see them on menus anymore. They are spiked with a good dose of lemon juice, I believe, giving them a unique tang. Unusual and delicious. Boudin balls are deep fried sausage balls, served with a creole mustard sauce. Again, delicious! Just skip the biscuits.

Corn and sweet pepper fritters at Mat & Naddie's in Uptown. Actually, a lot of what we had at Mat & Naddie's was fantastic. We had a 4 course Reveillon dinner here. Reveillon is a December New Orleans tradition. Originally, it was the big feast after fasting at Christmas. Now, it's a bunch of New Orleans restaurants offering multi-course dinners for very reasonable prices during the month of December. So, December is a good month to visit New Orleans if you are a foodie. The corn fritters were light and crispy, like little crunchy clouds filled with sweet corn. These people know their fried foods! We also had incredible shrimp risotto, smoked quail on manchego waffles and eggnog creme brulee. They have an excellent wine list filled with unusual selections too.

Aren't they pretty!


Chocolates at Sucre on Magazine St. Not only are they stunningly beautiful, they are delicious. I bought a collection of them for my dear chocolate-loving friend Ronnie and she assures me that they were all wonderful. I bought some for myself and I agree! Sucre is a lovely sweet shop, on a funky section of Magazine St. Magazine is the prime shopping district, full of galleries, restaurants and shops.

There was so much we didn't get to try, like muffeletas, raw oysters, bbq shrimp and po' boys. So, we need to go back. There is always more good stuff to discover and eat in New Orleans.

Thursday, December 9, 2010

An Impressive Raspberry Trifle


Here's an impressive holiday dessert, a Raspberry-White Chocolate-Almond Trifle. I pulled this recipe off of Epicurious.com a few years back and I've made it twice to rave reviews. It's not often I make a recipe more than once. It has to be knock-out good. And this recipe qualifies.

This is not a difficult recipe but it does have a number of steps and components. Don't be intimidated! Give yourself enough time to get all the pieces done, put it together and let it chill until you need to serve. Everyone will be impressed.

Crisp ladyfingers are found in some supermarkets in the cookie section or in Italian groceries. They are the same ladyfingers used in tiramisu. Typically, they come in 7 oz packages with 24 cookies in each.

A tip on washing and drying raspberries -  put them in a colander and spray them with cold water. Then shake them gently. Finally, place berries on a clean kitchen towel, hollow side down so any water inside the berries drains out. Fresh raspberries are delicate little things and this is the best way to clean them without banging them up. And since these berries are garnish, you want them to look pretty.

The order of assembly is important here. If you put the hot melted jam on top of the whipped cream, it will deflate the cream, so follow the order in the recipe to keep the cream light and fluffy.

Full disclosure on this recipe: the second time I made this recipe, I grabbed the vanilla extract instead of the almond extract. Still tasted great! So, if you only have vanilla and don't want to spring for a bottle of almond, go for it. It will be just fine.

Raspberry, White Chocolate and Almond Trifle
(serves 16-20)
Adapted from Epicurious.com

Requires 5 hours of chilling after assembly and can be made up to 24 hours before serving

3 ½ cups Chilled Heavy Whipping Cream, divided
12 ounces High-Quality White Chocolate (Such As Lindt Or Perugina), chopped
1 ¼ teaspoon Almond Extract, divided
½ cup Sugar
½ cup Water
7 ounces Boudoirs Or Champagne Biscuits (Crisp Ladyfinger Cookies)
1 cup Raspberry Jam, melted
2 12-ounce Packages Frozen Unsweetened Raspberries, partially thawed
2 6-ounce Containers Fresh Raspberries, washed and dried
¾ cup Sliced Almonds, toasted

Bring 1 cup cream to simmer in medium saucepan. Remove from heat. Add white chocolate; whisk until smooth, which will take a couple of minutes. Cool to barely lukewarm, about 10 minutes. You don't want to add hot chocolate to the cream because it will deflate the whipped cream.

Beat 2 1/2 cups cream and 1/2 teaspoon almond extract in a large bowl to soft peaks. Fold in white chocolate mixture.

Stir sugar and 1/2 cup water in small saucepan over medium heat until sugar melts. Mix in 3/4 teaspoon almond extract; remove syrup from heat. Quickly submerge 1 biscuit in syrup; shake excess back into pan (I found that the ladyfingers acted like a sponge so there wasn't anything to shake off). Place dipped biscuit in bottom of 14-cup trifle dish. Repeat with enough biscuits to cover bottom of dish (should be 8 ladyfingers).

Spread 1/3 of melted jam over biscuits in dish. Top with 1/3 of partially thawed berries with juices. Spread 1/3 of whipped chocolate cream over berries. Repeat layering with dipped biscuits, melted jam, partially thawed berries, and whipped chocolate cream 2 more times. Mound fresh berries in center of trifle. Sprinkle almonds around edge.

Cover and refrigerate at least 5 hours.

Link to PDF of Raspberry, White Chocolate and Almond Trifle

Saturday, November 27, 2010

Leftovers - how to use up stuffing


I have an over-abundance of stuffing. This has nothing to do with the deliciousness of my stuffing. It was quite tasty. But when your mother-in-law brings a bathtub full of mashed potatoes, your friend brings corn pudding and you make a sweet potato casserole, there is bound to be leftovers. There is just so much starchy food that people can eat, particularly when they are saving room for pie and homemade vanilla ice cream.

Lots of turkey soup recipes say throw in some stuffing. I don't get this. I haven't tried that, mind you. It simply doesn't sound that appetizing to me. I would much rather put in wild rice (see last year's post on Turkey-Wild Rice Soup) or barley. Stuffing does freeze well and it's nice to have a stockpile for the rest of the comfort food season. But, my favorite way to use up stuffing is to cook it for breakfast. Heat it up in the microwave or oven. This speeds up the process a bit. Break up the stuffing in a skillet with a little butter or nonstick cooking spray. Make a nest in the stuffing and break an egg into the hole(s). This is not a particularly brilliant suggestion but it is one that I personally love. Stuffing is the perfect start for breakfast - it's got bread and usually some sausage. Isn't that the start of most great breakfasts? Just add eggs. Think of it as the Post-Thanksgiving version of Toad-in-the-Hole.

I included a link to the original recipe in my pre-Thanksgiving post. I made a number of adjustments, so here's a link to the PDF of my adapted  Apple-Sausage Stuffing.

Tuesday, November 23, 2010

Thanksgiving 2010


Here we are, on the eve of another Thanksgiving. Who doesn't like Thanksgiving? OK, the poor devil that gets stuck cooking everything. I'm not sure why anyone would want to cook everything on the table for Thanksgiving. Even as a professional, I don't want to be stuck with that much cooking. You can go commercial, buying some of the dinner. I prefer to enlist the help of my friends. I do the turkeys (see last year's Thanksgiving posts Turkey Brining and Turkey Cooking) and a few other things, which I discuss below. And I let my guests provide the rest. In my house, Thanksgiving is not when I impress folks with my cooking prowess. It's about sitting down to far too much food, and enjoying what everyone has provided. Kind of like the first Thanksgiving when everyone who attended reportedly brought something to the feast. Can't say I've ever been disappointed in this arrangement. Everyone brings something they are proud of, so everything is delicious.

Besides the usual turkeys, I am making a bunch of new recipes. Yes, I am a crazy woman who tries out new recipes on my guests at Thanksgiving. But, hey, if you can't try new stuff on your best friends and family, who can you try it out on?

Here's what I'm making:
From Epicurious.com: Apple-Sausage Stuffing but with my modifications.

From Anne Burrell at the Food Network: Sweet Potato Casserole

From The Pioneer Woman blog: Nantucket Cranberry Pie which was part of a Throwdown with Bobby Flay last week. Not really a pie. More like a cobbler. But, as there are two other pies coming from my guests, I thought I'd try a non pie dessert. I am making vanilla ice cream to go with it. Homemade vanilla ice cream. What can be better than that?

Hope everyone has a very Happy Thanksgiving especially my dear Pamela who will be spending her first Thanksgiving away from home with family in New Jersey and New York. Sweetie, we miss you!

Monday, November 15, 2010

Shrimp, Tomato and Avocado Salad

This appetizer came together at the last minute. I had some cooked shrimp and wanted to make a first course salad with them. Everything else in this recipe just happened to be lying around my kitchen. That's how recipes get created in my kitchen. I start with an ingredient and then figure out what other things I have that will complement it.

The tomatoes were the last of my ripe garden tomatoes. Not my favorite variety but with the other flavors, they were fine, which means this would work with your average dull supermarket tomatoes. Pomegranates are in season right now and they add a surprising crunch to this colorful salad. I've made a few modifications to the recipe I made for a dinner party, making the presentation more elegant.

Shrimp, Tomato and Avocado Salad
(serves 4)

4 martini or wine glasses, chilled

12 oz cooked shrimp (small shrimp are fine)
3 medium tomatoes
1/4 cup pomegranate seeds
1 medium avocado
juice of 1/2 lime
2 tbl lemon olive oil OR 2 tbl extra virgin olive oil and zest of 1/2 lemon
2 tbl chopped cilantro
salt and pepper
large pinch of mild or medium pure chile powder, such as New Mexican red Chimayo
4 sprigs of cilantro for garnish

1. If the shrimp are 31/40's or larger, cut into bite-size pieces, about 1". Place in a medium bowl.


2. Dice the tomatoes and combine with the shrimp. Add the pomegranate seeds, season with salt and pepper.


3. Add lime juice, lemon oil, cilantro, and chile powder to shrimp-tomato mixture and toss gently.


4. Dice the avocado. Season with salt and pepper.


5. To assemble, place 1/8 of the shrimp-tomato mixture in each glass. Then place a small layer of avocado pieces followed by 1/4 of the remaining shrimp-tomato mixture. Finish off with remaining avocado.


6. Chill in refrigerator for 30-60 minutes. Garnish with cilantro sprigs and serve.


Note: Do not chill much longer than 1 hour because the shrimp is likely to get mushy from the lime juice.


Link to PDF of Shrimp, Tomato and Avocado Salad

Thursday, November 11, 2010

Baked Penne with Butternut Squash and Turkey Sausage

Here's a recipe to use the tomato sauce that I posted in my previous blog post dated October 27. This is a tasty fall pasta dish. It uses butternut squash, a beautiful seasonal ingredient. Adding the squash up's the nutrition and makes the pasta very filling with a relatively small portion of sausage. And this is quite filling - it's a grand meal served with a mixed green salad.

The cinnamon is an interesting addition. It evokes Greek pastitsio more than Italian. Greek pastitsio and Italian pasticcio are similar and a bit more complicated than this recipe since they use a bechamel sauce. Both are delicious but this is a lot easier.

Baked Penne with Butternut Squash and Turkey Sausage
(serves 8)


1 Tablespoon Extra Virgin Olive Oil
1 medium Onion, chopped
2 cloves Garlic, minced
½ cup Dry White Wine
¾ pound Sweet Italian Turkey Sausage, without casings
½ teaspoon Ground Cinnamon
1 pound Butternut Squash, ¾" dice, about 4 cups
2 cups Tomato Sauce

1 cup Vegetable Broth
⅓ cup Heavy Cream
Salt And Black Pepper
1 pound Penne Pasta
3 ounces Soft Mild Goat Cheese (Such As Montrachet), crumbled
3 ounces Shredded Part-Skim Mozzarella

¼ cup Grated Parmesan Cheese

1. Preheat oven to 450℉. Coat a 13"x9"x2" baking dish with cooking spray and set aside.

2. In a large Dutch oven, heat the oil over medium-high heat. Add the onion and saute until golden. Stir in the garlic and saute 1 more minute. Pour in the wine and cook until it has evaporated and the onion is browned, about 8 minutes. Add the sausage and cook, breaking up into chunks with a spoon, until it is no longer pink. Add the cinnamon.

3. Add the squash, tomato sauce, broth, and cream. Cook, stirring occasionally, until the liquid boils. Reduce the heat and simmer, covered and stirring occasionally, until the squash is tender, 15 minutes. There should be plenty of liquid. Season to taste with salt and pepper. Set aside.

4. While the squash is cooking, bring a large pot of water to a boil. Cook penne according to package directions until al dente. Drain well.

5. Combine goat cheese and mozzarella in a medium bowl.

6. Add the pasta to the sauce and stir. Add ½ of the cheese and mix well. Spread the pasta in the prepared baking dish, smoothing out the top. Top with the remaining cheese mixture and the Parmesan cheese.

7. Bake until the cheese melts and bubbles, about 15 minutes. Let sit 5 minutes before serving.


Adapted from The Essential Best Foods Cookbook by Dana Jacobi, Rodale, 2008.

Wednesday, October 27, 2010

Homemade Tomato Sauce

I have never much liked canned tomato sauce. It's aggressive - overly tart and one-dimensionally tomato. Homemade tomato sauce is a totally different flavor. It captures the sweet freshness of ripe tomatoes without being too sweet (like many a jarred spaghetti sauce). It is fresh tomato transformed into something that you can stow in your freezer. When you pull it out to use in the dead of winter, you will think of beautiful summer tomatoes.

I have made a number of fresh tomato sauce recipes from Marcella Hazan, the queen of Italian cooking. Nowadays, there are other Italian queens but Hazan is still tops in my book. At the release of her The Classic Italian Cook Book, it was said that she did for Italian food what Julia Child had done for French food. In 2010, it's hard to read it and think of it as revolutionary, but in the 1970's, when originally released, Italian food in the US did not include pesto, polenta, arugula or broccoli rabe. Not unless you happened to be part of an Italian-American family and lived in a major city like NY or Boston.

This recipe, which I made recently when Roma tomatoes were cheap and field ripened, is great for freezing. I used it in a baked penne dish and it was so much better than anything that came out of a jar or a can.

Fresh Tomato Sauce adapted from Marcella Hazan's The Classic Italian Cook Book
(makes 6 servings, about 3 cups)
This recipe can be doubled or tripled and the sauce freezes very well.

2 pounds fresh ripe Roma tomatoes, cut in half lengthwise
1/4 cup extra virgin olive oil
1/3 cup finely chopped yellow onion, about 1/2 a medium onion
1/3 cup finely chopped carrot, about 1/2 a medium carrot
1/3 cup finely chopped celery, about 2 stalks
1 teaspoon salt
1/4 teaspoon sugar

1. Cook tomatoes in a covered 2 quart saucepan at a steady simmer for 10 minutes.
2. Uncover and reduce heat to hold a gentle simmer. Cook for 1 1/2 hours.
3. Run the tomatoes through a food mill to remove the skins and seeds.
4. Rinse and dry the saucepan. Add the olive oil and lightly saute the onions over medium heat. The onions should be translucent but not browned.
5. Add the carrot and celery and saute for another minute.
6. Add the pureed tomatoes, salt and sugar. Cook at a gentle simmer, uncovered, for 20 minutes. Stir occasionally.
7. Sauce can be used for pasta immediately, or frozen in 1 or 2 cup containers for a touch of summer in the middle of winter.

Note: If you don't have a food mill, you can skin and seed the tomatoes before cooking. You'll lose some of the flavor but it will still be far superior to canned sauce.

Link to PDF of Fresh Tomato Sauce

Friday, October 22, 2010

A couple of new things at World on a Platter

You may have noticed the Foodie Blog Roll on the right hand side of my blog. There are tons of food blogs listed here. Maybe you'll find some new interesting food blogs using it. For me, it increases traffic on my blog and so far it's given me the opportunity to meet some other fun food bloggers out there. Us foodies are one big hungry community and we love to chat and share. It's kind of cool!

The other thing you will notice are links to pages on Foodista.com on some of my blog posts. Foodista is a nifty food wiki. If you look at my recent blog post on cucumbers, there is a link to the Foodista page on cucumbers. It contains a lot of useful information about cucumbers, like growing, storage, and seasonality. I think these links will help my readers learn more about ingredients, techniques and tools I mention in my posts. I think it's a pretty spiffy site.

Thanks again to all my loyal readers and keep on cooking!

Monday, October 18, 2010

Why do we love cooking?

I have been spending a lot of time thinking about how to get young adults excited about cooking. Statistics show that Americans spend little time cooking. How little? In the 90's, on average, we spent 15 minutes a day cooking. Not per meal, per day. This is incredibly sad for those of us who love to cook and appreciate that cooking for yourself is key to both your spirit and your health.

As part of my continuing research on this subject, we are going to have a little bit of class participation. I hope you are willing to indulge me with this parlor game. Most of you reading this like to cook. Why? What happened in your life to turn you on to cooking?

To start things off, I'll give my story. My mom didn't trust or like processed foods. And she definitely had a knack for cooking (which she presumably got from her mom, also an excellent cook). Growing up, my mom cooked almost everything from scratch. She also believed that her kids should know how to cook. We joined 4H and learned basic cooking skills. We helped at home. In high school, my mom started catering out of the house and we all pitched in. Oddly enough, I was the pickiest eater in the house and often refused to eat the food my mom cooked. But, I liked cooking it even if I wouldn't eat it. How crazy is that? In college, my eating patterns broadened quite a bit. Certainly not because the food was so good there! I finally came to appreciate how fantastic the food cooked by my mom really was. After that, I was totally hooked on cooking and eating great food. It's only become a bigger and bigger force in my life.

What's your story? I can't wait to learn something new about my friends and get more further insight into why we love to cook.

Tuesday, September 21, 2010

Cooking Cucumber

Most folks (American folks, specifically) would never think to cook cucumber. Cucumber is purely a salad or pickle ingredient in the US. But, there are food cultures who have embraced cooked cucumber. In China, cucumber is never eaten raw (pickled, yes, but not raw) and I have included 2 stirfries with cucumber below. China isn't the only country to enjoy cooked cucumbers though. France - yes, France - cooks cucumber. I can't say I've ever seen it on a menu in a restaurant or cooked it French-style myself, but Julia Child includes a number of cooked cucumber recipes in her Mastering the Art of French Cooking.

I very much enjoy the Chinese treatment of cucumbers. Cooked cucumber is what zucchini wishes it could be. It retains its crunch. It doesn't get watery and Chinese spices accentuate the mild flavor. It's also a great way to use overgrown garden-grown cucumbers. And, are there any gardeners who haven't found a giant cucumber hiding among the leaves? Well, I'm here to tell you there is something you can do with it. If you do use oversized cucumbers, cut off about half an inch on either end. Bitter compounds accumulate there and these pieces will often be quite bitter.

Stir-Fried Cucumber (serves 3-4)

2 large Cucumbers
1 Tbsp Oil
½ Tbsp Garlic, minced
1 tsp Ginger, minced
1-2 tsp Chili Paste
1 Tbsp Soy Sauce
¼ tsp Sugar
¼ tsp Salt

Peel cucumbers and cut each one in half lengthwise, and scoop out the seeds with a spoon. Cut each half in two lengthwise again and cut each section crosswise into 1" pieces.

Set a wok or skillet over a high flame and add oil. When oil is hot, drop in garlic, ginger, and chile pepper or paste, and stir for a few seconds. Add cucumber and stir-fry  for 1 minute. Add soy sauce, sugar, and salt and cook for another 3-4 minutes. Serve hot.
 

Link to PDF of Stir-Fried Cucumbers 

Garlic Chicken with Cucumbers (serves 2-4)

¾ pound Boneless Skinless Chicken Breast
½ large Cucumber
¼ tsp Salt
2 tsp Peanut Oil
2 tsp Minced Garlic
1 tbl Minced Scallion
2 tsp Soy Sauce
2 tsp Rice Wine Or Dry Sherry
¼ tsp Chili Paste


Cut chicken into 1" cubes and set aside.

Peel cucumber, halve lengthwise and scoop out seeds with a spoon. Cut lengthwise again, into quarters. Cut quarters into cubes. Sprinkle cubes with salt and put into a colander to drain for 20 minutes. Rinse the cucumber under cold water and blot dry. Salting the cucumber removes excess moisture.

Heat the oil in a wok or large skillet. When it is hot, add chicken and stirfry for a few seconds. Add the garlic, scallion, soy sauce, rice wine/sherry, and chile paste. Stir fry for another 2 minutes. Add the cucumber and keep stirfrying another 3 minutes.


Link to PDF of Garlic Chicken with Cucumbers

Cucumber 

Sunday, September 5, 2010

Slow cooked green beans from the garden

Beans from the garden

I've been gone a while. Shipped the only child off to college (very successful). Traveled around the east coast visiting old friends (also very successful). Returned to a garden overrun with very large green beans. My house sitter wasn't very diligent about picking the beans and many of them got quite large. Like 8-12" long. Even stringless pole beans develop strings at this stage so either you chuck them onto the compost pile or you cook the heck out of them. I have never been a fan of undercooked green beans so cooking them to death (if done properly) does not bother me in the least.


This recipe is as easy as it gets.There is no reason to use small beans here; in fact, that would be a waste of small, tender beans which are best steamed and eaten with a little butter and salt. Save this method for overgrown beans from your garden or large supermarket beans.


This recipe is dedicated to Ronnie. I have many recipes for slow cooked beans and they all include lots of onions. Ronnie does not like onions. Trust me, slow cooked beans are just as good without the onions.


Slow-Cooked Beans
(serves 4)


1 pound large green beans (really big will work fine)
2 tbsp olive oil
2 large cloves garlic, sliced
2 cups peeled tomatoes (either canned or fresh)
1 tsp dried oregano
1 tsp salt
1/2 tsp freshly ground black pepper
1-2 cups water


1. Wash green beans and remove stems. Cut large beans in half. Don't worry too much about strings because you will cook them long enough to dissolve these.
2. Heat olive oil in a large skillet with a cover.
3. Saute garlic until golden.
4. Add tomatoes and mash until large chunks break up.
5. Add green beans, oregano, salt, pepper and water. The quantity of water is dependent on how big the beans are. If they are not too big, use 1 cup. If they are really big and need to cook a long time, use 2 cups.
6. Bring to a brisk simmer and cover. Cook until beans are very tender, about 30 minutes.
7. Remove lid and continue to cook to evaporate most of the liquid.
8. Check seasoning and add more salt if necessary. A little drizzle of extra-virgin olive oil is nice too.


Link to PDF of recipe for Slow Cooked Beans (no onions)

Friday, July 16, 2010

Cooking over a wood fire

When I was a teenager, I would go camping with my aunt and uncle. We would drive many hours to Moose Brook State Park, north of the White Mountains in New Hampshire. This being the North Woods, there was never such a thing as a wood fire ban, as we have on a regular basis here in Colorado. We had a Coleman stove for cooking but every night we would get a good, hot wood fire going and cook some of our dinner over the fire (provided it wasn't raining, which is did more than I care to remember). There is something very special about cooking over a wood fire. It's not easy, like cooking over a gas grill. More like cooking over charcoal, but even less reliable. Wood doesn't burn as consistently as charcoal, so the fire may not burn hot enough for cooking. It burns faster than charcoal, so you have to be vigilant to add more wood and keep the coals going. It's challenging, largely because most of us lack the necessary skills anymore. When was the last time you cooked over a wood fire? Have you ever cooked over a wood fire?


I recalled these long dormant skills this month. My lovely niece Lindsay was visiting from the east and we took her camping in Rocky Mountain National Park. I cooked the entire meal over the wood fire and dinner was a great success. It sprinkled and rumbled a bit just before dinner. Just enough to add some suspense to the proceedings but not enough to ruin our meal. All my clothes smelled strongly of wood smoke. My eyes burned from the inevitable smoke that blows in your face. But, it was worth the pain, the trouble, the constant tending of the fire. There is something very primal about tending a wood fire and cooking your food over it.


We had baked potatoes, fresh asparagus and garlic sauteed on a cast iron griddle, and a delicious marinated top sirloin. Dessert was smore's, of course. I've included the marinated steak. I'm sure it will taste wonderful cooked on your gas grill, but it will never taste as good as that steak cooked over a live fire.


Ginger-Soy Grilled Steak
[Recipe from Epicurious.com]
(serves 4)


Ingredients

 ● 6 tbsp soy sauce
  ● 1/4 cup chopped onion
  ● 1/4 cup rice vinegar
  ● 2 tbsp oriental sesame oil
  ● 1 tbsp chopped peeled ginger
  ● 1 cup chopped green onions
  ● 1 1/2 lb. top sirloin steak, about 1 inch thick


Directions:
Blend first 5 ingredients in processor until almost smooth; pour into a large glass dish or ziploc bag. Mix green onions into marinade. Add steak and turn to coat. Cover and refrigerate at least 1 hour and up to 1 day, turning steak occasionally.


Prepare barbecue (medium-high heat). Pour marinade into small saucepan and bring to boil; then pour into small bowl. Grill steak to desired doneness, about 5 minutes per side for medium-rare. Transfer steak to cutting board. Cut steak crosswise on diagonal into thin slices. Serve steak with marinade as sauce.


Made for campfire cookout. Delicious especially cooked over wood fire.

Link to PDF of Ginger-Soy Grilled Steak

Tuesday, July 6, 2010

Wine (and some Beer) in Italy

As promised, a blog post on drinking in Italy. Italy is a country of wine. Beautiful inexpensive wine. Yeah sure, there are some very expensive beautiful wines, but I didn't try many of them. The dollar isn't so strong over there that I'm going to spend 50-60 euro on a bottle of wine. But, not to worry. There is plenty of lovely wine to be had for very little. 


House wine is not the disaster it is in the US. It's local, cheap, and from what I tried, universally decent. And I mean cheap: most of the time you can get a 1/2 liter of wine for 7 euros. Now, that's a bargain! Don't ask me what I drank because I don't know. In Venice, it was from the Veneto. In Cinque Terre, I have no idea what it was but it was white, refreshing, and delicious. In Reggio-Emilia, it's Lambrusco and in Tuscany, it's Toscana. I drank a fair amount of Chianti too and it was all good. Sadly, we missed a food & wine festival in Siena by one day. When we arrived in Siena, they had a giant Chianti cork, complete with the rooster, by the train station. We didn't take a picture and it was gone by the time we returned later in the day. In Rome, we drank Frascati because the weather was hot as the blazes and Frascati is cold. It was good too.


I am definitely the wrong person to ask for specific wine recommendations in Italy since my plan was to order what was local nearly everywhere and not think too much about it. Call me lazy. Call me cheap. Hey, it worked! I wasn't disappointed in any of the wines I got.


We did splurge one night. We went to Cantinetta Antinori, the wine bar owned by the Antinori family in Florence. Even better, it's in the Palazzo Antinori, which has been occupied by the family since the 15th century. How many of you have enjoyed lovely wine in a Florentine palazzo? Cantinetta Antinori isn't really a wine bar. Far more formal than a wine bar and it's not exactly cheap. Their wine list by the glass features wines exclusively from Antinori estates, and the food was excellent. I have been a fan of Villa Antinori Toscana IGT for years; we even drank some of it somewhere else. But, since they have many of their better wines by the glass, you come here to try them without having to buy a whole bottle. We had a glass of the Peppoli Chianti Classico DOCG and a glass of the Marchese Antinori, a Chianti Classico DOCG Riserva. They were both delicious but I liked the Peppoli a little better. They are 90% Sangiovese but the Peppoli uses Merlot and Syrah to make up the remaining 10% while the Marchese uses Cabernet Sauvignon. If you really want to splurge at Cantinetta Antinori, you can order a glass of Tignanello, Antinori's Super Tuscan. I think it was 30 euro a glass. Don't ask me the vintage. At 30 euro, I didn't look that closely! This was the fanciest restaurant we ate at in Italy. The service was impeccable and it's a lovely space.


On to beer...there is plenty of beer in Italy. Mostly lager and great on a hot day. Which they have plenty of in Italy! It was muggy and  over 100 degrees in Naples. Good beer drinking weather, for sure. I only found one microbrew while we were in Reggio-Emilia. We ate dinner at a wonderful restaurant called Osteria La Casa di Nonna in Bibbiano. They had bombers of local beer. Unfortunately, I didn't note the producer. I doubt you can find it anywhere except in the countryside near Parma. We enjoyed Peroni red ale at their brewpub in Rome, a casual and reasonably priced restaurant. As brewpubs go, not much of a selection though - Peroni lager and Peroni red ale.


My advice to anyone traveling to Italy - drink lots of wine. Drink lots of local wine and you won't be disappointed. You'll also get off cheap.

Monday, June 21, 2010

Eating in Italy

I recently returned from over 2 weeks in Italy. It was my first trip there and I did my best to eat as much as I could without killing myself. The food, with a few exceptions, was fantastic. Here are some observations, should you be lucky enough to find yourself eating in Italy.

  1. Italian food is very regional. You will find things in Venice (like sweet and sour sardines) that you won't find in Rome or Parma. And you will find deep-fried artichokes in Rome but not in Venice. That said, some things are found throughout Italy, like pasta with a fresh tomato sauce, pizza, or gnocchi with pesto. The pesto varies somewhat but it's still a basil sauce, after all. Be sure to seek out the regional specialities because they are always stand-outs.
  2. Veal is popular and cheap. I love veal but never eat it because it is extremely expensive in the US. It's very, very good throughout Italy.
  3. There is very little chicken on menus in Italy. Chickens are for laying eggs, not for eating. We did see it on a few menus but it was unusual.
  4. Pizza is a bargain everywhere. In Venice, panini are an incredible deal. There are sandwich shops all over Venice and you can get great Panini from 2.50 to 4 euros.
  5. Things like prosciutto and aged Parmesan cheese are ridiculously cheap by US standards. You can get 28 month Parmesan for about $7/pound in Reggio-Emilia, the home of Parmesan. I would have brought back a wheel of the stuff if I didn't have to carry the damn thing.
  6. There are far fewer vegetables on plates in Italy than I expected. Maybe it's because restaurants serve food that folks don't get at home (and as far as I can tell every single Italian grows some food for themselves if they have any room to do so). Sure, you can order a salad or a contorni (side dish) but most of the time, 2 out of 5 sides are something with potatoes.
  7. Potatoes are very popular! More so than I ever thought.
  8. Bread is regional too and forget about finding much of the whole grain variety. In Tuscany, bread is made with no salt. Not a favorite with my daughter.
  9. Italians love their pork products: prosciutto, speck, cooked ham, all manner of salami, mortadella. It's fantastic everywhere and reasonably priced if you get it at a market.
  10. Gelato ranges from very good to sublime. Best gelato of the trip was in Levanto (just north of Cinque Terre) and Vernazza (one of the Cinque Terre).
  11. It's not possible to pick a single "best" dish of the trip. There were many great dishes: risotto with apples and prosecco in a trattoria in the countryside of Reggio-Emilia, risotto with seafood in Rome, pasta with seafood in Corniglia, a frutti del mare platter on Murano (including some of those sweet and sour sardines), a strawberry cream tart at Antinori's wine's bar in Florence, and the most unexpected exceptional dish, fresh pasta purses stuffed with pears and ricotta with a walnut cream sauce at the Peroni brew pub in Rome.
  12. Eat whatever you want. When you get home, the food won't be as universally excellent and you need to take advantage of the fine eating while you can!
If you have specific questions about eating in Italy, send me a comment and I'll do my best. Obviously, we did not visit all of Italy nor do I claim to be an expert in the nuances of regional Italian cuisine.

Saturday, May 8, 2010

North Carolina BBQ - by request

I do take requests here. Sometimes it takes me a while to get to the request, but with a little reminding, I try to find what you are looking for.


I made this bbq pork for a Christmas party, where my lovely Italian friend Luisa tried it. It's a traditional North Carolina pulled pork. John K. who is from N. Carolina, may have a different opinion but this recipe came from Steve Raichlen's excellent BBQ book BBQ USA, and he does know his way around a smoker. [All Raichlen's bbq books are excellent, by the way.]


North Carolina pulled pork is different because the sauce is a somewhat spicy and highly vinegary sauce, nothing like what most folks think of as bbq sauce. But, it is absolutely addictive.


Nothing about the process is difficult, but it takes a while because great bbq'ed pork is cooked low and slow. I prefer to cook it outside on the grill because it is easier to inject some smoke. It can be made in the oven, but you may end up smoking up your house. Or you can skip the smoke part. Still tastes good but never as good as pork with some smoke added.


The recipe calls for a bone-in pork butt (despite its name, a pork butt is the shoulder). I can't usually find a bone-in pork butt at my local CostCo but a boneless one works too.


Lexington Pulled Pork Sandwiches
(serves 12)


For the rub:
  ● 4 tsp sweet paprika
  ● 1 tbsp brown sugar
  ● 1 tbsp salt
  ● 1 tsp black pepper
  ● 1 tsp white pepper
  ● 1 tsp dry mustard
  ● 1 tsp garlic powder
  ● 1/2-1 tsp cayenne pepper

For the pork:
  ● 1 boston butt, bone-in pork shoulder, 5-7 pounds
  ● hickory chips, for smoking, soaked in water for 1 hour

Lexington Vinegar Sauce
  ● 2 1/2 cups cider vinegar
  ● 1/2 cup ketchup
  ● 2 tbsp brown sugar
  ● 1 tbsp hot sauce, Crystal is the preferred brand here
  ● 4 tsp salt
  ● 4 tsp hot red pepper flakes
  ● 1 tsp freshly ground black pepper
  ● 1 tsp white pepper
  ● 1 1/2 tbsp BBQ rub, reserved from pork rub above

Lexington Slaw:
  ● 1 medium green cabbage, about 2 pounds
  ● 1 cup Lexington Vinegar Sauce
  ● kosher salt, to taste
  ● 12 hamburger buns

Directions:

Make the rub: Combine all rub ingredients in a small bowl and stir to mix. Set aside 1 1/2 tablespoons for the Lexington Vinegar Sauce. Sprinkle the remaining rub all over the pork, patting it onto the meat.

Set up the grill for indirect grilling* and preheat to medium-low. Place the wood chips in the smoke chamber or on the hot side in a pouch made of foil. Turn the heat up to high and run the grill until you see smoke. Reduce the heat to medium-low.

Place the pork, skin side side up (if there is skin), over a drip pan on the not heated side of the grill. Cook the pork until darkly browned on the outside and very tender inside, at least 4 hours and as long as 6 hours. The internal temperature should be 195℉. If the pork starts to brown too much, cover it loosely with foil.

While the pork is cooking, make the sauce and slaw. To make the sauce, combine all the sauce ingredients in a large non-reactive bowl with 1/2 cup water. Whisk until the sugar and salt dissolve. The sauce will keep for several weeks in the refrigerator. Bring it to room temperature before using.

To make the slaw: remove the core from the cabbage. Cut the cabbage into 8 chunks and process in a food processor, pulsing to cut the cabbage into small pieces. The cabbage should be chopped, not sliced. You can also cut it with a knife by slicing it, then cutting up the slices into small pieces. Place the cabbage in a large non-reactive bowl and stir in vinegar sauce. Taste for seasoning and adjust salt. Let stand for 10 minutes, then taste again for seasoning, adding more salt or vinegar sauce to get it where you like it. The coleslaw can be made up to 4 hours ahead. Store in the fridge until needed to build sandwiches. If you make it just before you take the pork off the grill, you can leave it at room temperature if you plan on serving the pork right after you pull it apart.

Transfer the cooked pork to a cutting board, cover it with foil and let it rest for 20 minutes. Pull the pork into large pieces, discarding any bones or lumps of fat. Heavy-duty silicone oven mitts are very helpful here. Using a fork, shred the large chunks into thin shreds.

To build a sandwich, put pulled pork on hamburger bun, top with slaw and add vinegar sauce to taste.

*Indirect grilling means one side of the grill is hot while the other side is not. You cook the pork on the cold side. You put your chips on the hot side.  This setup emulates an oven; the meat never sits over direct flame and it cooks low and slow.

Wednesday, April 28, 2010

Rhubarb season is upon us!

 
By RhubarbFarmer (Own work) [CC-BY-SA-3.0 (http://creativecommons.org/licenses/by-sa/3.0)], via Wikimedia Commons

My friend Donna has started to offer me free rhubarb; it must be rhubarb season. If you have a couple of healthy rhubarb plants, you know this drill. It's the spring version of zucchini. You leave unmarked bags of the stuff on your neighbor's stoop, just to be rid of it. I am amazed that they can even sell it at the local farmer's market. Doesn't everyone have a neighbor or a friend with an overgrown rhubarb patch?

Last year, while driving back from mushroom hunting in the mountains, I spied a huge stand of rhubarb off the road. I was not driving, thankfully! Jane was and she screeched to a stop. "I need rhubarb!" Well, we surely got it. The rhubarb stand had probably been planted a long time ago when Left Hand Canyon was dotted with mining claims and mining cabins. The rhubarb plants were nearly as tall as me. Jane, if you are reading, I hope you will be back in late June so we can go pick you some more!

This recipe came from Nicole Routhier's Fruit Cookbook. The recipe is for a Strawberry-Rhubarb Brulee, but I didn't brule it. :-) I made the fruit part and it is first rate with yogurt, granola, or ice cream. It's not so sweet that is isn't appropriate for breakfast. Unlike some strawberry-rhubarb recipes, the strawberries are not cooked. I don't like cooked strawberries. I find their texture mushy and slimy. This recipe retains some of the bite.

Strawberry-Rhubarb Compote
(makes 6 - 8 servings)


3 cups strawberries, hulled and sliced 1/4" thick 
1 tbsp lemon juice
1 tbsp orange liqueur, such as Grand Marnier or Triple Sec 
1/3 cup sugar, plus 2 tbsp sugar
1 pound rhubarb, cut into 1" sections 

1. In a large mixing bowl, combine the sliced strawberries, lemon juice, Grand Marnier, and 2 tbl of sugar; mix well. Cover and let stand at room temperature for 30 minutes.

2. Meanwhile, combine the rhubarb with the remaining 1/3 cup sugar in a medium saucepan. Cover and cook over low heat until the rhubarb is very soft and shredded. Remove from heat and set aside to cool to room temperature.

3. When rhubarb is cooled, combine with strawberries and refrigerate for at least 2 hours to allow flavors to meld.

Serve with yogurt, whipped cream or as a topping for shortcake or pound cake. Also good with granola.


Thursday, April 22, 2010

Raspberry Yogurt Mousse


I mentioned, on Facebook, a tart I made with a raspberry mousse filling. It generated some interest with my loyal readers so here is the recipe. Compared to your typical mousse, it's leaner and tarter, due to the yogurt, which replaces the cream. Also, if raw egg whites give you the willies, this mousse contains none. Egg whites do make the mousse light - lots of air bubbles in beaten egg white. So, this mousse is denser, more like a pudding, I guess.


Still quite tasty and refreshing. The recipe calls for raspberries, but other berries work will too - blueberries, strawberries, blackberries. In fact, I was a little short on raspberries and used some strawberries instead.


The recipe calls for yogurt without stabilizers or gelatin. You want the whey to separate out to make the yogurt thicker. Yogurt stabilized with gelatin or starches won't separate.


Raspberry Yogurt Mousse
(makes enough filling for a 10" tart or 10 individual servings)


 3 cups fresh raspberries, or 12 oz. frozen raspberries, partially thawed
 1/2 cup cold water
 3 tsp unflavored gelatin
 1/4 cup orange juice, or apple juice
 1 tbsp fresh lemon juice
 1/4 cup sugar
 1/4 tsp salt
 2 tbsp Chambord (a French berry liqueur)
 1 1/2 cups nonfat or lowfat vanilla yogurt, made without gelatin or stabilizers

1. Puree berries in a  food processor or blender. Pour puree through a strainer to remove the seeds. Set aside.

2. Pour water into a medium saucepan, sprinkle on the gelatin, and allow to sit for about 3 minutes to soften. Stir in juices, set pan over low heat, and stir just until the gelatin dissolves. Do not boil.

3. Stir in the berry puree, sugar, and salt, increase the heat to medium and cook, stirring, for 3 to 4 minutes, or until the sugar is dissolved. Remove from heat and stir in Chambord.

4. Transfer raspberry mixture to a heatproof bowl and sit it in a large bowl of ice water. Cool, stirring occasionally, for about 15 minutes or until mixture thickens to the consistency of raw egg whites.

5. While the mixture cools, set the yogurt in a strainer over a bowl and allow to drain for about 10 minutes.

6. Whisk the yogurt into the raspberry mixture. The mousse can get used a filling for a 10" pie (use a prebaked crust that has cooled) or pour into 4-6 oz ramekins to serve alone.


Link to PDF of Recipe for Raspberry Mousse

Wednesday, April 7, 2010

Oven Preserved Tomatoes

I like tomatoes on my sandwiches. Tomatoes can be rather messy on sandwiches and seriously comprise the integrity of the bread. They squirt out the side and you end up with tomato seeds on your shirt.

Recently, I had a glut of grape tomatoes. I knew they wouldn't keep for very long. I could dry them, but dried tomatoes don't work very well on sandwiches. I also find that their flavor is just too concentrated for tossing in a salad or on a sandwich. This method, which is too simple to be called a recipe, is the best way I've found of preserving smaller tomatoes. Anything from grape on up to Roma size works well. The flavor of the tomato gets concentrated into sweet goodness and they are delicious on sandwiches.

Originally a recipe from Claudia Roden's book on new Middle Eastern cuisine, I have reduced the sugar. Her recipe is a form of tomato jam but I wanted something more savory. The reduction in sugar means that the tomatoes won't keep as well, but I'm sure you'll find a way to use them up. They taste great on sandwiches and you won't end up with tomato seeds on your shirt.


Oven Preserved Tomatoes


Wash 2 lbs. of tomatoes.


Preheat oven to 250 degrees.


Halve grape or Roma tomatoes and place cut side up on a rimmed and oiled baking sheet.


Sprinkle tomatoes lightly with kosher salt, about 2 tablespoons olive oil and 1 tablespoon sugar.


Place in the oven and bake for 3-4 hours. The tomatoes will still be squishy and not thoroughly dried. Store them in the refrigerator.

Monday, March 22, 2010

A Simple Potato Gratin

Potatoes are yummy. I love them in all their infinite preparations. Potato chips are one of the few dangerous foods in my life. This potato gratin is still quite delicious but not nearly as dangerous as potato chips. Since it uses no cream and little cheese, you can eat a bit of it without feeling guilty.


The potatoes can be sliced with a knife if your knife skills are good. A mandoline makes it a bit easier and you can slice the potatoes much thinner than if you use a knife (unless your knife skills are exceptional).


This is a simple technique but it is widely adaptable. I don't use cream in the base recipe, but if you want something richer, cream works just fine. Better than fine, actually, but I don't routinely cook with cream.


You slice the potatoes thinly and layer them with seasonings in a large gratin pan or a quiche pan. You add some liquid so the potatoes stay moist while they bake. At the end, you add a little cheese and brown up the top. Takes a bit of time to bake but it's very easy. And the results are quite delicious.


Simple Potato Gratin
(serves 6)


5-6 medium russet potatoes, sliced thinly (see notes)
1/2 tablespoon fresh herbs or 1/2 teaspoon dried herbs (see notes)
butter or olive oil
salt and pepper
2 cups stock or cream
1 ounce finely grated hard cheese such as parmesan or romano
1 tablespoon chopped parsley (optional)


1. Preheat the oven to 375 degrees F.
2. Liberally grease the gratin pan with olive oil or butter.
3. Put a single layer of potatoes in the pan, overlapping somewhat.
4. Sprinkle on herbs, salt and pepper. Drizzle on some olive oil or dot with butter.
5. Use the remaining potatoes to add another layer. Sprinkle with more salt and pepper.
6. Add liquid. It should not quite cover the potatoes.
7. Cover the gratin pan with foil and bake for 1 hour. The potatoes should be quite tender.
8. Raise the oven temperature to 425 degrees F.
9. Sprinkle the gratin with cheese and bake for another 15 minutes.
10. Remove from oven, recover with foil and let sit for 5-10 minutes. It will be extremely hot so you want to let it cool and set up before serving.
11. Sprinkle on parsley, if using, and serve.


Notes: You want to use russet (aka Idaho potatoes) here because the starch binds the gratin together. Waxy potatoes, such as red or Yukon golds, don't contain enough starch.

You can use fresh or dried thyme, tarragon (particularly good if you are cooking the potatoes in cream) or parsley. If using rosemary, only use fresh. Dried rosemary is too tough.


Link to PDF of Simple Potato Gratin Recipe

Thursday, March 18, 2010

Phyllo Apple Pockets

A lot of folks are afraid of phyllo, that tissue-thin dough from Greece. It is true that phyllo can be tricky but once you know what you are doing, and get used to working quickly, it's not very hard. You need to follow some simple rules when dealing with phyllo.


Most phyllo is sold frozen. It needs to defrost slowly, in your refrigerator. Give it at least 24 hours. Don't unwrap it or unroll it until it is thoroughly thawed. It will just crack up into a million little shards. Even if you follow these instructions, it might stick together or crack. I have found that certain brands are more reliable than others. One market may treat it with more respect than another. These are, unfortunately, things you learn the hard way.


When you are ready to use your phyllo, unwrap it and unroll it. Lay it out flat and keep it covered with plastic wrap. This is extremely important. Phyllo dries out in a New York minute. I work with it in the semi-arid climate of Colorado. If I can keep it pliable here, you can do it anywhere. As you pull a sheet off the pile, cover it again. It shouldn't be uncovered for more than a few seconds.


Brush the phyllo immediately with melted butter. You can use olive oil (often used in savory preparations), even non-stick cooking spray instead. This will keep the phyllo pliable so you can fold it, roll it up, or squish it into a muffin cup (as is done in the recipe below). You don't have to drench it in fat. It will be crispier if you go light on the butter or oil.


Here's a tasty dessert that uses phyllo dough. It doesn't use much, which is nice because sometimes you have a quarter of a pound left over. It's quick and easy, once you get the hang of that phyllo dough. It's been Pamela-tested. She loves it.


Phyllo Apple Pockets
(makes 6)


2 tablespoons unsalted butter
2 medium apples, peeled, cored, and diced (about 2 cups)
1/3 cup sugar
4 tablespoons fresh lemon juice
2 teaspoons cinnamon
1/4 teaspoon salt
3 tablespoons melted butter or butter-flavored nonstick cooking spray
6 large sheets phyllo dough
6 tablespoons natural applesauce

1. Preheat oven to 350 degrees.
2. Melt butter in a large skillet. Add apples, sugar, and lemon juice. Cook over medium-high heat until most of the lemon juice has evaporated. Remove from heat and add cinnamon and salt.
3. Lay a sheet of phyllo down on a cutting board. Brush it with butter or spray it with cooking spray. Fold the sheet over and then fold it over again. You want to end with a square that is approximately 6"x6". Since the size of phyllo sheets is variable, you are going to have to use your judgement on the best way to fold it.
4. Take the phyllo square and place it in a large muffin cup or a large ramekin.
5. Repeat with remaining phyllo sheets.
6. Put 1 tablespoon of applesauce in each cup. Add about 1/3 cup apple mixture on top of applesauce.
7. Fold over edges of phyllo to cover apples. Brush with butter or spray with cooking spray.
8. Bake for 25-30 minutes, until phyllo is golden brown. Serve warm or hot (though Pamela says they taste just fine cold).


Note: Leftover pockets can be refrigerated. Reheat for 10 minutes in a 350℉ oven before serving.


Link to PDF of Phyllo Apple Pockets Recipe

Friday, March 5, 2010

Grating Ginger and a Ginger-Spiced Cucumber Salad

If you cook a lot of Asian food, you grate or mince a lot of ginger. Ginger comes in big "hands" and it's rare to find young ginger. It can be rather stringy stuff. If you mince it with knife, it takes some work to mince it fine. A microplane works well, but the strings clog up the little holes of the microplane.


I had some ginger in the freezer - a tip I had gotten from Food Network. I needed to grate said ginger for a cucumber-ginger salad. I discovered that freezing the ginger helps in the grating quite a bit. It's convenient as well. You usually end up buying more than you need and it often sits in your fridge, shriveling up or getting moldy, until you have to throw it out.


If you buy a big chunk of ginger, peel it, pop it in a plastic bag and throw it in the freezer. When you need some, no need to thaw it. Take it out and grate it on your fine microplane. You'll end up with a pile of fluffy grated ginger and it will thaw almost instantly.


Most serious home cooks have a microplane by now. If you are a serious cook and you don't have one, you need one. You probably need a few of them. It's a small investment for the best kitchen tool to come around in a long time. The microplane is based on a woodworking rasp. It is unbelievably effective at grating anything - ginger, chocolate, parmesan cheese. It is the best tool for zesting citrus; nothing else even comes close to removing the zest while leaving the pith. Microplanes come in a number of sizes. I have a fine one that I use for zesting citrus or grating ginger. I have a medium microplane that I use for grating parmesan cheese. There are bigger holed microplanes that are good for shredding cheese. I haven't invested in one of these, but it will be my next microplane purchase.


Here's the ginger-cucumber recipe I made and it packs quite a ginger punch. It's adapted from one I pulled off a recipe site. With my adaptations, it reminds me of a Thai salad - it combines sweet, sour, bitter and spicy. It's very easy and quite refreshing. It is much, much better if it chills overnight. It mellows the ginger quite a bit and the cucumbers are more like pickles.


Ginger-Spiced Cucumbers
(serves 4)


2 tablespoons red wine vinegar
2 tablespoons packed brown sugar
1/4 cup mirin
2 tablespoons fresh lime juice
1 tablespoon grated fresh ginger
1 large cucumber, peeled and thinly sliced
1/2 medium onion, thinly sliced
1/4 teaspoon Japanese 7 spice (Shichimi Togarashi)
1/2 teaspoon kosher salt


1. Combine vinegar, brown sugar, mirin, lime juice and ginger in a bowl.
2. Mix in cucumbers and onions. Toss to combine.
3. Cover and chill at least overnight before serving.
4. Drain before serving. 
5. Sprinkle with 7 spice and salt.


Note: Mirin is a Japanese rice wine. It can be found at Asian markets and natural food stores. Japanese 7 spice (Shichimi Togarashi) is a spicy blend used for seasoning and can be found at Asian markets. A pinch of cayenne can be substituted but it lacks the complexity.


Link to PDF of Ginger-Spiced Cucumber Recipe

Followers