New Location

You can find all the old content and new stuff too at worldplatterblog.wordpress.com

Tuesday, April 26, 2016

"Flourless" Chocolate Almond Cake with Dried Cherry-Almond Caramel Glaze


This isn't a flourless cake, hence the quotes around flourless in the title. It does include flour, but it's flour turned into a form acceptable for Passover. There are a whole lot of rules for baking at Passover. As I am not at all observant, I make a cake because it tastes good. I would never recommend a cake just because it is Kosher for Passover.

Passover may be halfway over now but if you are like me, that can of matzoh cake meal is still mostly full, because how many cakes are you going to bake and eat in a week? Here is a cake that tastes great AND helps you use up that can of matzoh cake meal. In fact, it's so good, I would make this when it's not Passover. If you don't have matzoh cake meal, I'll bet it will work just fine with cake flour instead.

It's a variation on a classic chocolate-almond torte. Lots of butter, lots of chocolate, lots of eggs - separated so that the whites provide the leavening. Instead of the small amount of flour in such a torte, it contains matzoh cake meal. Which is flour made into matzoh turned back into flour. Yeah, it's one of the imponderables of religion.

"Flourless" Chocolate-Almond Torte with Dried Cherry-Almond Glaze
(serves 16)

For the cake:
butter or margarine for greasing the pan
2 sticks(½ pound) butter or margarine, at room temperature
8 oz. semisweet or bittersweet chocolate, chopped
¾ cup slivered almonds, toasted (see Note)
1 cup sugar
⅛ teaspoon salt
6 eggs, at room temperature, separated
1 teaspoon vanilla extract
½ cup matzoh cake meal

For the glaze:
½ cup dried sour cherries
¼ cup Kirschwasser (cherry brandy)
1 cup sugar
½ cup slivered almonds, toasted and coarsely chopped

Grease the bottom of a 9" x 3" springform pan. Line the bottom with parchment. Grease the parchment and the sides of the pan. Set aside.

Position a rack in the center of the oven and heat the oven to 350°F. Melt the chocolate in a medium bowl set over a saucepan of hot, barely simmering water. Remove the chocolate from the heat and set aside.

Meanwhile, process the almonds in a food processor until finely ground and set aside. In a stand mixer fitted with the paddle attachment (or with an electric hand mixer), beat the butter with ¾ cup of the sugar and the salt on medium speed until soft and fluffy, 2 to 3 minutes. Add the egg yolks and vanilla and mix on medium-low speed until smooth. Gently fold in the chocolate, ground almonds, and matzo cake meal.

In another large bowl, using the whisk attachment or clean beaters, beat the egg whites on high speed until they form soft peaks. Add the remaining ¼ cup sugar and beat until the egg whites form stiff peaks,. 

In three batches, use a rubber spatula to gently fold the egg whites into the chocolate mixture. Scrape the batter into the prepared pan, spread evenly, and bake until the top starts to brown and a toothpick inserted into the center comes out with just some moist crumbs attached, 40-45 minutes.

While the cake is baking, soak the cherries in the liqueur in a small bowl. Run a sharp knife around the edge of the pan to release the cake from the pan. Let the cake cool in the pan on a rack for 15 minutes.

While the cake is cooling, make the glaze:
In a heavy-based medium saucepan, stir the sugar and ½ cup water together over medium heat until the sugar dissolves. Raise the heat to medium high and cook, swirling occasionally and brushing down the sides of a pan with a wet pastry brush to wash down any sugar crystals, until the caramel turns a deep, amber brown. Carefully add ¼ cup water (it will bubble a lot; be careful as it is VERY hot), and whisk together until the mixture acquires an even, syrupy consistency. Drain the cherries and then stir them into the caramel, along with the chopped almonds.

Remove the sides of the springform pan. Using a second rack, flip the cake over and remove the bottom of the pan. Peel off the parchment paper. Place a 12" cake plate over the cake and flip to get the cake on the plate. Pour the caramel mixture evenly over the cake, distributing the cherries evenly over the top. The glaze will spill over the sides. Let the cake cool completely to room temperature before serving.

Note: To toast the almonds, place them in a small baking pan in a 325°F oven for 8-10 minutes, stirring occasionally so they toast evenly. Watch carefully once they start to brown because they can burn quickly.

Altitude Adjustment (5400 ft.):
  • Preheat oven to 375°F.
  • When beating egg whites, beat to very soft peaks before adding the sugar. Once the sugar is added, only beat to soft peaks.
  • Reduce the oven temperature to 350°F when you place the cake in the oven.
Adapted from a recipe at Epicurious.com

Wednesday, April 20, 2016

Food Photos: The Bane of My Existence


Why do I use photos that clearly aren't a photo of the dish I'm writing about? Because I hate having to take photos of my food! Sometimes, it's my dinner. If I need to style the dish, I'm eating a cold dinner. No thank you! Sometimes, my dinner isn't particularly photogenic. As a blog reader, I'm annoyed by articles that have endless photos of the food from every angle along with many photos of the production. Overkill, I say. I also have no patience for scrolling over a bunch of photos to get to the recipe I am looking for.

But, a photo is important for catching a reader's eye in the overwhelming noise that is the internet. That's why I include interesting photos of food that I have found in Wikipedia Commons in my posts, when I don't like/can't be bothered to snap a gauzy, perfectly lit photo of my dinner (oh, wait, I never do that). Live with it. I cook and I write about food which is my passion. Photography definitely isn't my passion. I leave that to people who are way better at it than I am!

Now, I discover that the photos blow up my list of most popular posts. Ugh! As I said, photos make me crazy. [It's a bug in the widget from Blogger so I hope the thumbnails will reappear at some point.]

The photo above is mine. It's not all that pretty but that cauliflower sure tastes good! It's seasoned with tahini, lemon juice, and Aleppo pepper. Aleppo red pepper is slightly spicy - not nearly as hot as crushed Italian red pepper - and has a lovely fruity flavor. I think it's far more useful in the kitchen than crushed red pepper because it's more subtle. Find some. You won't be sorry. It's great on eggs, hummus, chicken, and right here in this cauliflower recipe.

Roasted Cauliflower with Tahini and Lemon
(serves 4-6)

non-stick cooking spray
1 large head of cauliflower
salt
¼ cup tahini
juice of 1 lemon
¼ to 1 teaspoon Aleppo red pepper

Preheat oven to 400°F. Spray a large rimmed cookie sheet generously with non-stick cooking spray.

Trim off leaves and cut off the tough bottom of the stem on the head of cauliflower. Most of the stalk is edible so don't try to cut out all of it. It will cook up tender. Slice the cauliflower about ½" thick. The slices won't hold together; doesn't matter. Put the cauliflower, in a single layer, on the greased cookie sheet. Spray with cooking spray and sprinkle with salt. Roast the cauliflower in the hot oven for 30 minutes or until tender.

While the cauliflower is roasting, combine the tahini, lemon juice, and Aleppo pepper in a small bowl. Set aside.

When the cauliflower is done, remove from the oven and increase the heat to broil. Spread the tahini sauce evenly over the cauliflower. Return the cauliflower to the oven and broil until the sauce browns up. Serve hot.

Wednesday, April 13, 2016

Rhubarb Cake


A simple snacking cake that uses a common garden vegetable: rhubarb. If you have friends with a garden, ask them if they have rhubarb so you don't have to buy it. Every gardener I know has more than they need. Remember that only the stalks are edible. The leaves contain too much oxalic acid (it's actually the chemical that gives rhubarb its distinctive tart flavor), making them poisonous to humans.

If you have an electric mixer, you can make this cake.

You can use a food processor to chop the rhubarb, or chop it with a knife.

Snacking Rhubarb Cake
(serves 12)

butter or non-sticking cooking spray for greasing pan
1 ½ cups fresh or frozen and thawed rhubarb, finely chopped
1 stick unsalted butter, at room temperature
1 cup light brown sugar
½ + ¼ cup white sugar
1 large egg, at room temperature
1 cup natural applesauce (little added sugar)
1 teaspoon vanilla extract
2 cups flour
½ teaspoon salt
¾ teaspoon baking soda (use 1 teaspoon at sea level)
1 teaspoon ground cinnamon

Preheat oven to 375°F. Grease a 9" x 13" baking dish well with butter or non-stick cooking spray.

Using an electric mixer, cream the butter, light brown sugar, and ½ cup white sugar in a large bowl. Beat in the egg, vanilla, and applesauce until combined. The batter may break (mine did) but don't worry about it. In a medium bowl, mix together the flour, salt, and baking soda. Add to the batter and mix gently until nearly completely incorporated. Add the rhubarb and stir until it is a uniform batter. Pour into the prepared dish. In a small bowl, mix together ¼ cup sugar and cinnamon. Sprinkle uniformly over the top of the cake. Bake for 35 minutes.

When the cake comes out of the oven, run a knife along the edge to release the cake from the pan. Allow to cool completely before serving from the pan. The cake is very moist and sweet. I don't believe it needs any embellishment, but some sliced strawberries would be OK.

Tested at altitude from a recipe at http://www.rhubarbinfo.com/cake, a great source for all things rhubarb.

Photo credit: By RhubarbFarmer (Own work) [CC BY-SA 3.0 (http://creativecommons.org/licenses/by-sa/3.0)], via Wikimedia Commons

Tuesday, April 5, 2016

Cream of Asparagus Soup with Lemon


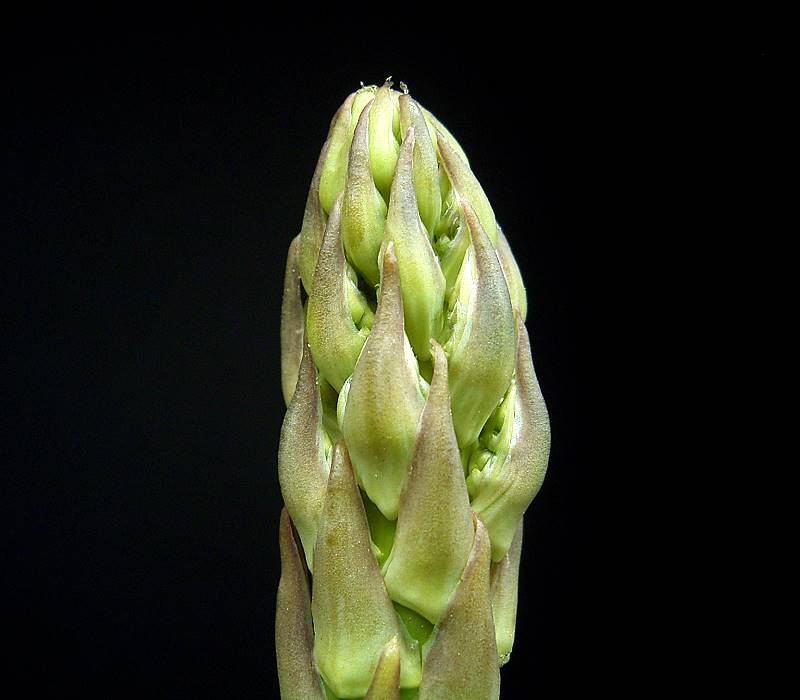
Springtime means asparagus. We won't have any local asparagus here in Colorado for a while yet. But, it's turning up at bargain prices in the supermarket (some weeks as low as $1.50/pound). We love asparagus roasted, steamed, and grilled. Here it is featured in a fresh-tasting soup. It gets some thickness from the potato, which means you don't need to use a lot of cream. The lemon keeps it bright and light.

I like to buy thick spears of asparagus and for this recipe, that is the best choice. You'll be peeling them and it's pretty dang hard to peel a skinny stalk of asparagus! If you don't peel the asparagus, you'll have a bunch of stringy fibers that don't purée well. If you have a really good blender, like a VitaMix (I don't, but I used them when I worked in restaurants), no worries. It can handle the peels. My blender isn't that effective, so I make sure to peel the stalks.

Cream of Asparagus Soup with Lemon
(serves 8)

1 ½ pounds asparagus
5 cups low-sodium chicken stock
4 medium shallots, peeled and minced
1 medium baking potato, peeled and cut into ½" dice
2 lemons
¾ cup heavy cream
salt and black pepper

Trim off about ½" of the bottom of the asparagus stalks. Peel the lower ⅔'s of each stalk. Cut off the tips and set aside. Cut the rest of the stalks into 1" lengths. Set aside in a bowl.

Zest the lemons and put the zest in the bowl with the asparagus stalk pieces. Add the shallots and the potato. Juice 1 lemon and set aside the juice.

In a medium soup pot, heat up the stock. Cook the asparagus tips in the stock for 2-3 minutes, until tender. Remove with a slotted spoon and set aside.

Add asparagus stalks, shallots, zest, and potato to the stock. Cook for 30 minutes until the potato and asparagus are very tender.

Blend the contents of the pot until smooth. You can use an immersion blender right in the soup pot or you can transfer the soup, in batches, to a blender. Return the puréed soup to the pot. Add the cream and reheat until hot but not boiling. Stir in the lemon juice, salt (how much will depend on your palate and the type of stock you use), and ¼ teaspoon black pepper.

Serve with the reserved asparagus tips as garnish.

Adapted from 300 Sensational Soups by Carla Snyder & Meredith Deeds, Robert Rose, Inc., 2008.

Photo Credit: By Frank Vincentz (Own work) [GFDL (http://www.gnu.org/copyleft/fdl.html) or CC-BY-SA-3.0 (http://creativecommons.org/licenses/by-sa/3.0/)], via Wikimedia Commons

Friday, April 1, 2016

Indonesian Beef with Onions


Another recipe adapted from the fantastic (and long out-of-print) The Good Cook series of cookbooks from Time-Life.

I used Thai Black Sweet Soy. Indonesian sweet soy sauce, called kecap manis, is also a sweet soy. I won't say they are interchangeable, but Thai sweet soy also results in a very tasty dish. Use what you have, is my motto!

Indonesian Beef with Onions
(serves 4)

1 pound top round steak, thinly sliced

Marinade
1 large onion, cut into chunks
3 large cloves garlic
3 Tablespoons kecap manis or Thai sweet soy sauce
10 peppercorns, crushed
3 Tablespoons sweet soy
pinch of ground nutmeg

1 Tablespoon oil
1 large onion
1 14 oz. can diced tomatoes, including liquid
1 stick of cinnamon
2 whole cloves

Pulverize the onion and garlic in a food processor. Place in a bowl and mix in the remaining marinade ingredients. Add the sliced beef and toss to coat. Set in the fridge to marinate for 30 minutes to an hour. Drain the beef, reserving the marinade.

Heat the oil in a wok over medium-high heat. Cook onions until they start to wilt. Increase heat to high. Add the beef and stirfry for a couple of minutes. Add the marinade and the rest of the ingredients. Reduce heat to medium. Cook until sauce thickens, about 5 minutes. Serve over rice. Try not to eat the cloves, but if you do bite into one of them, it won't kill you.

Adapted from The Good Cook: Beef & Veal, Time-Life Books, 1978.

Photo credit: By Jdmtdktdht (Own work) [CC BY-SA 3.0 (http://creativecommons.org/licenses/by-sa/3.0)], via Wikimedia Commons


Followers